Venues & Spaces
Set up bookable venues with a public booking calendar, build floor-plan and seat maps for reserved-seating events, and claim your venue's public profile. This guide covers creating a venue, its booking settings, seat-map layouts (AI-generated or from templates), attaching a seat map to an event, and venue claiming.
- Bookable venues & spaces, a room or your whole space with open hours and a public booking calendar. Managed under Venues in the dashboard (each row is a bookable space).
- Seat-map layouts, a floor plan with sections, rows, and individual seats, used for reserved-seating events. Created and reused from the event editor.
- Public venue profiles, the canonical venue a public event lists (with its own page at
/venue/<slug>) that an owner can claim.
Creating a Bookable Venue
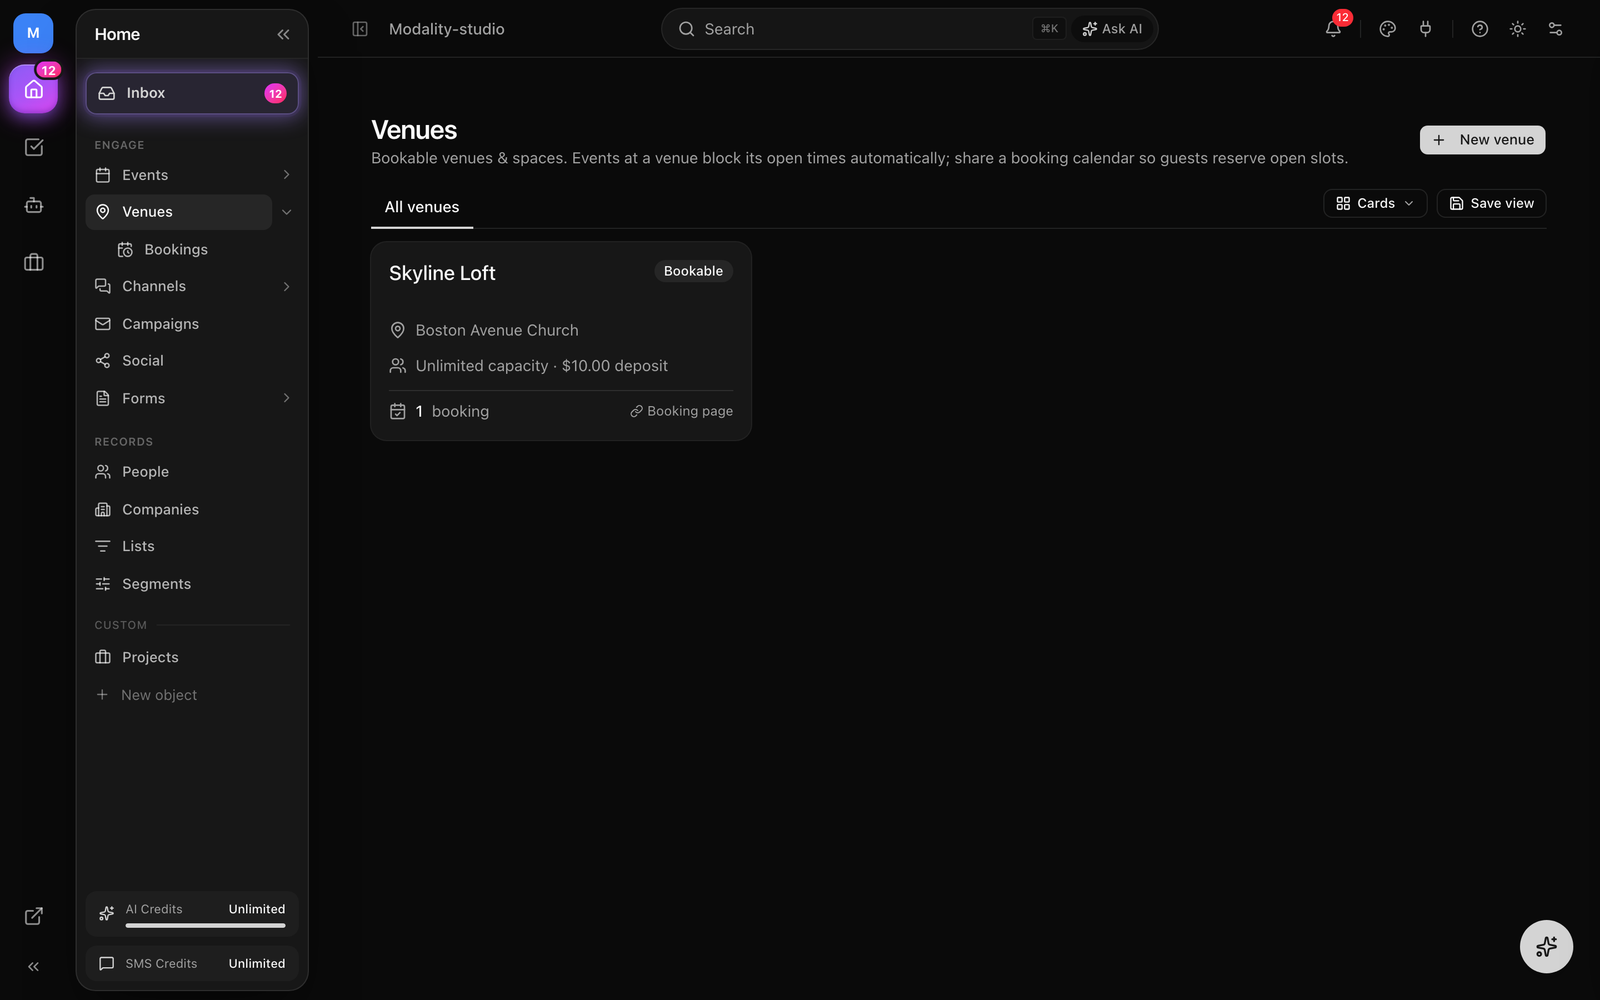
Under Venues in the sidebar you manage bookable spaces, a single room or your whole space. Each has open hours, booking rules, and can publish a public booking calendar guests reserve open slots from. Events scheduled at a venue block its open times automatically.
How to Create a Venue
- 1
Open Venues
Click Venues in the sidebar. The list shows every bookable space with its location, capacity, deposit, whether a booking page is live, and its booking count. Switch between Cards, Table, and Calendar views from the toolbar.
- 2
Click “New venue”
A venue is created with sensible defaults (Mon–Sun, 9:00–22:00 open hours) and opens straight to its editor.
- 3
Name it and link a physical venue
In Settings, set the name (e.g. "Main Room," "Grand Ballroom") and optionally pick the Venue it belongs to, events at that venue then block this space's open times.
- 4
Set booking rules
Configure capacity, deposit, durations, buffers, and open hours (see below).
- 5
Publish a booking page
Link (or create) a booking form to go live with a public booking calendar. See Booking Pages.
Venue Settings & Booking Rules
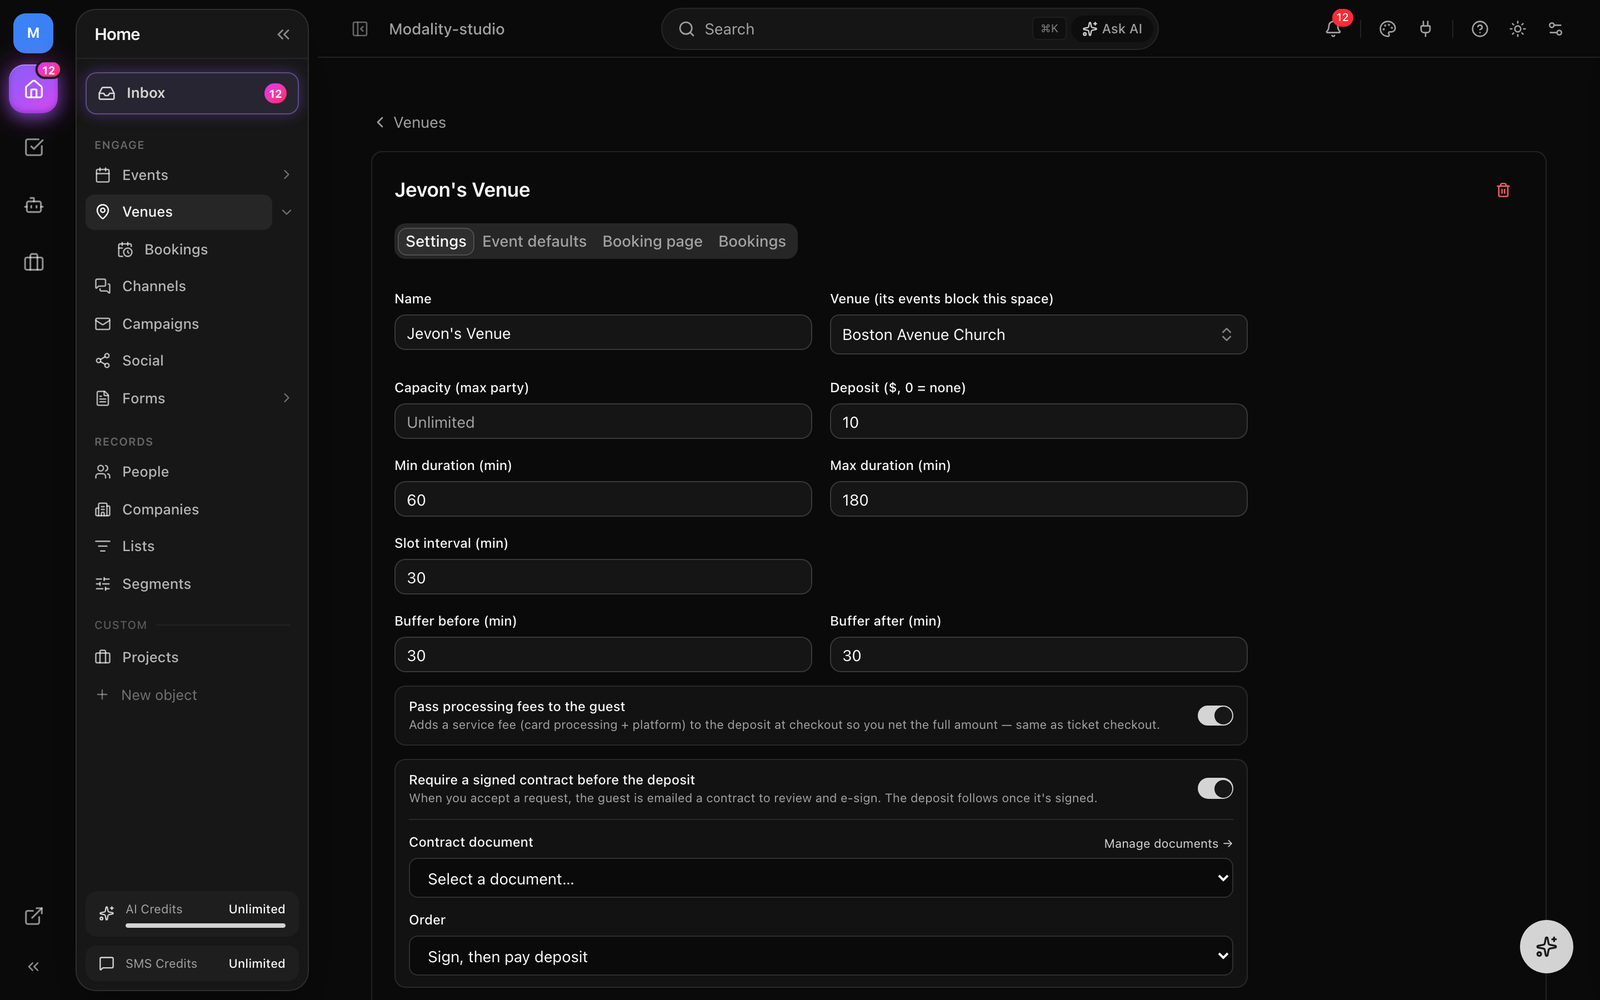
The Settings tab controls how and when guests can book. Every change auto-saves (there's no Save button, you'll see "Saving…" then "All changes saved").
- Capacity (max party), the largest party a single booking can be; leave blank for unlimited.
- Deposit, an amount collected to confirm a booking (0 = none). When set, you can toggle Pass processing fees to the guest so a service fee is added at checkout and you net the full deposit.
- Min / Max duration and Slot interval, the shortest and longest a booking can run, and how finely the calendar is divided into start times.
- Buffer before / after, padding held around each booking so slots don't butt up against each other.
- Open hours, per-weekday availability with a start and end time; toggle a day off to close it entirely.
- Block bookings around events at this venue, when on, events scheduled at the linked venue automatically block overlapping booking slots.
- Blocked times, manual blackouts (holidays, maintenance, private holds) added as a date with a from/to time and an optional reason; the availability engine honors them.
Require a Signed Contract
Turn on Require a signed contract before the deposit to gate bookings behind an e-signature. Pick a contract document (created in Documents / e-sign) and an order: sign, then pay deposit, or send contract and deposit together. When you accept a request, the guest is emailed the contract to review and e-sign, and the deposit follows.
Booking Pages
A booking page lets guests pick an open day and time and submit a request. It goes live once a booking form is linked, on the Booking page tab.
Link or Create a Booking Form
- On the Booking page tab, either link an existing form or click New form to auto-create one (name, email, phone, notes) already linked to this venue.
- When a guest picks a slot, the form opens pre-filled with the chosen date and time.
- Because a reservation is attributed to a person by email, the form must have an email field, if it doesn't, you'll see a warning and bookings won't create a reservation until you add one.
Design & Share
- Booking page design, set an accent color (re-colors day/time selection and the request button), page background, calendar background, text color, button text color, and an intro message.
- Public booking link, every venue with a linked form gets a live page at
/book/<venue-id>. Copy the link or open it from the tab. - Embed on your site, copy a ready-made iframe snippet to drop the booking calendar into your own website.
GIF: the Booking page tab, link a booking form, adjust the accent/background colors, then open the public /book/ page and pick an open slot to request a reservation.
Demo GIF / screenshot to be added
Bookings & Calendar
The Bookings tab lists reservation requests for the venue so you can review and accept them (accepting is what triggers the contract and/or deposit flow when those are enabled). The Venues list also has a Calendar view showing bookings across all venues or a single one; clicking an empty day starts a new event pre-filled with that date and venue.
Event Defaults
The Event defaults tab stores defaults tied to the linked venue (applied when you create events there), so recurring details don't have to be re-entered each time.
Floor Plans & Seat Maps
For reserved-seating events, Modality uses a seat-map layout, a floor plan broken into sections, rows, and individual seats. You build one from the event editor (see Reserved Seating below) and can reuse the same layout across events. There are three ways to create one:
- AI from a floor plan, upload a photo, diagram, or architectural drawing (JPG, PNG, or WebP) and AI detects sections, rows, and seats automatically. Best results come from overhead views or venue maps. Analysis costs 3 AI credits; if AI can't read the image, the venue is still created as a draft so you can build the map by hand (no credits are charged).
- From a template (free), start from a preset: Theater (248 seats · orchestra + mezzanine), Amphitheater (350 seats · curved tiered), or Banquet (80 seats · round tables). Templates never call the model, so they're free.
- Reuse an existing layout, search your saved venues and pick one. Empty drafts (0 seats, not linked to any event) can be cleaned up in bulk.
GIF: the seat-map setup flow, upload a floor-plan image, watch AI generate sections/rows/seats (3-credit badge), and the free Theater / Amphitheater / Banquet template alternatives.
Demo GIF / screenshot to be added
Fine-Tuning the Seat Map
Whether AI-generated or from a template, open the layout in the seat-map editor to refine it:
- Sections, rename, recolor, reorder, and set a category (standard, accessible, premium, or VIP).
- Rows & seats, define rows parametrically (label, seat count, start number, numbering step, reverse direction); regenerating rows rebuilds that section's seats. Choose a seat shape (circle, square, rounded, or chair) and section alignment/curve.
- Seat status, bulk-set selected seats to
ACTIVE,DISABLED, orRESERVED(e.g. to hold or remove specific seats). - Annotations & stage, add labels, stairs, ramps, exits, doors, and aisles, and place the stage so the map is oriented for buyers.
Using a Seat Map on an Event
Seat maps become reserved seating when you attach one to an event. In the event editor's Tickets step, switch the seating mode to Assigned seating:
- Turn on Assigned seating for the event.
- Set up map, create a new layout (AI/template) or link an existing one. Once linked, the button becomes Edit map.
- Map each section to a ticket type to set that section's price, a section inherits its ticket type's pricing.
- Publish. Buyers pick specific seats on the map during checkout; each seat is held while they check out and released automatically if the order isn't completed, so two buyers can never claim the same seat.
Screenshot: the event editor Tickets step with 'Assigned seating' enabled, the linked seat map summary, and each section mapped to a ticket type to set its price.
Demo GIF / screenshot to be added
Claiming a Venue Profile
Public events list a canonical venue that gets its own public page at /venue/<slug>, showing the venue's upcoming and past events and posts tagged there. If you operate the venue, you can claim that profile to mark it as officially owned.
How Claiming Works
From an unclaimed venue page, click "Own this venue? Claim it". There are two verification paths:
- DNS TXT (automatic), offered when we already know the venue's official website. You add a one-time
TXTrecord with the value we generate to that domain's DNS, then click verify. Because it's scoped to the venue's own known domain, it can't be used to claim an arbitrary place. DNS can take a few minutes to propagate; you can leave and resume with the same record. - Document (manual review), for venues with no known website. Submit a short note and supporting links; a Modality admin approves or rejects the request.
Venue Groups (Brands)
Once you've claimed one or more venues, you can group them under a single brand page (a venue group) at /venue-group/<slug>, useful for operators running multiple rooms or locations under one name.
Screenshot: the public venue page with the 'Own this venue? Claim it' link, and the claim screen showing the DNS TXT record (host / type / value) with the verify button.
Demo GIF / screenshot to be added