Invoices & Payments
Create professional invoices, collect a deposit up front, record cash and check payments by hand, and take card payments online through Stripe. Every invoice gets its own public payment page, tracks its balance as payments come in, and can be driven end-to-end by automations. Branding is inherited from your brand kit and invoice settings.
Overview
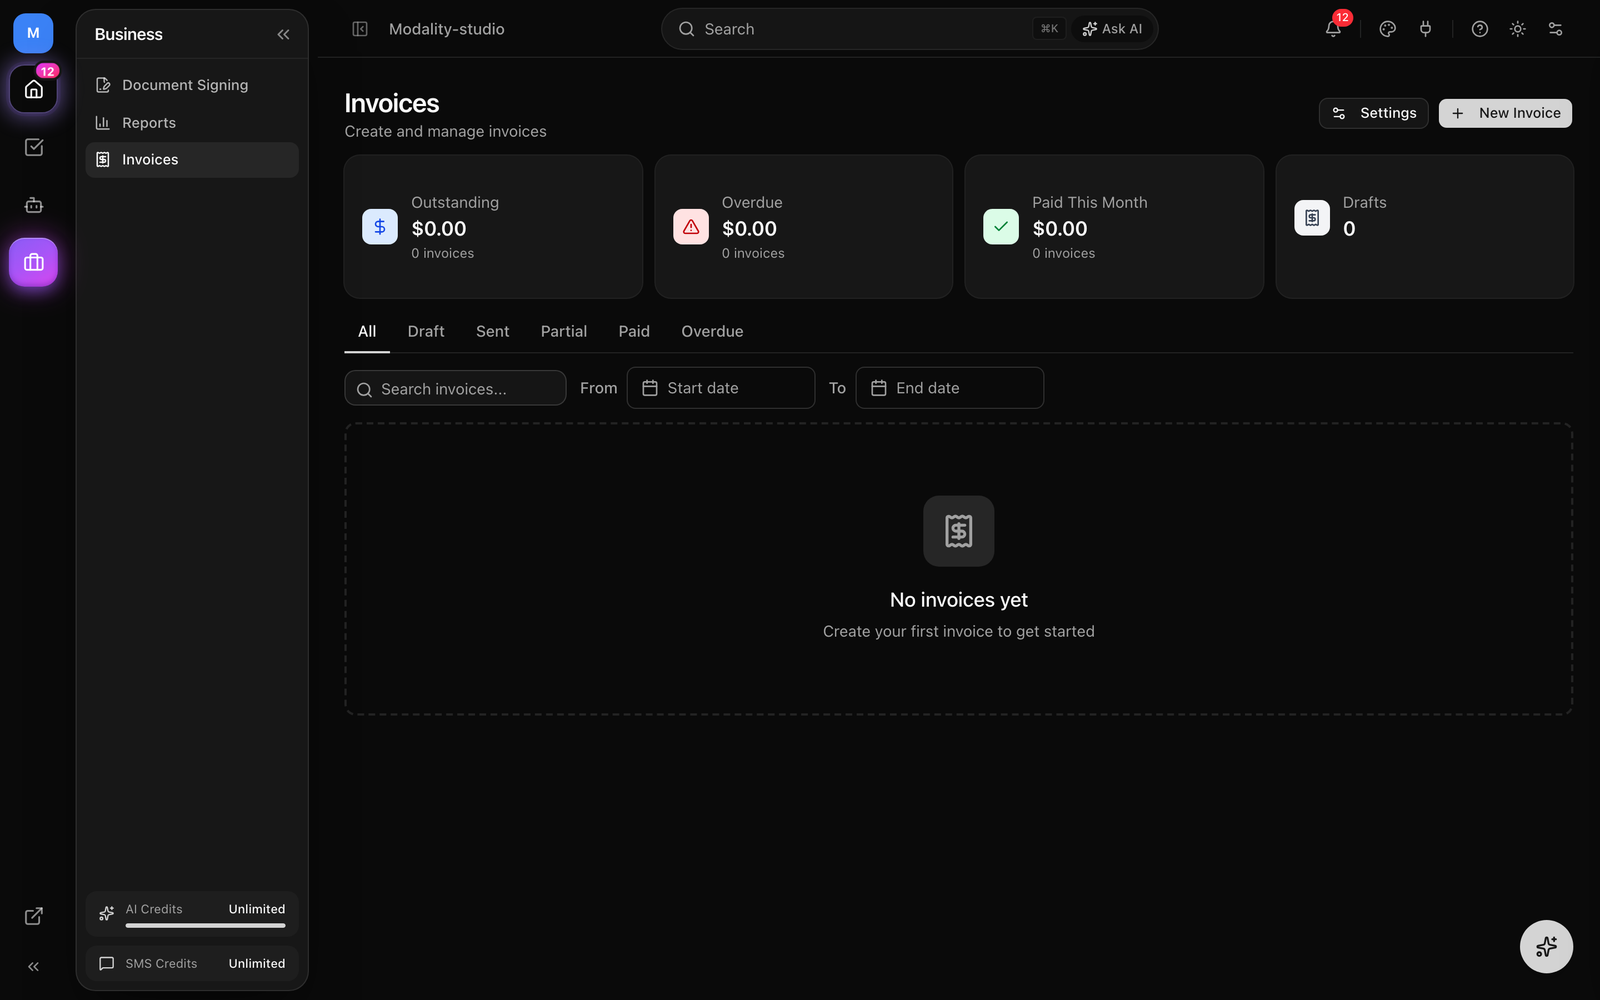
The Invoices module lets you bill contacts and companies directly from Modality. Each invoice carries line items, a discount and tax amount, payment terms, and a running record of every payment. Invoices are tied to your CRM contacts (and optionally a company record), so payments flow back into the customer's activity history automatically.
- Full-page invoice builder with line items, discount, and tax
- Auto-incrementing invoice numbers (
INV-001,INV-002, …) - Deposit-first collection, take a fixed deposit before the balance
- Record cash, check, and other manual payments; take card payments online
- Partial payments with automatic balance tracking
- Stripe-powered public payment page for every sent invoice
- Branded invoice emails and automatic overdue reminders
- Automation triggers and actions for end-to-end invoice workflows
Creating an Invoice
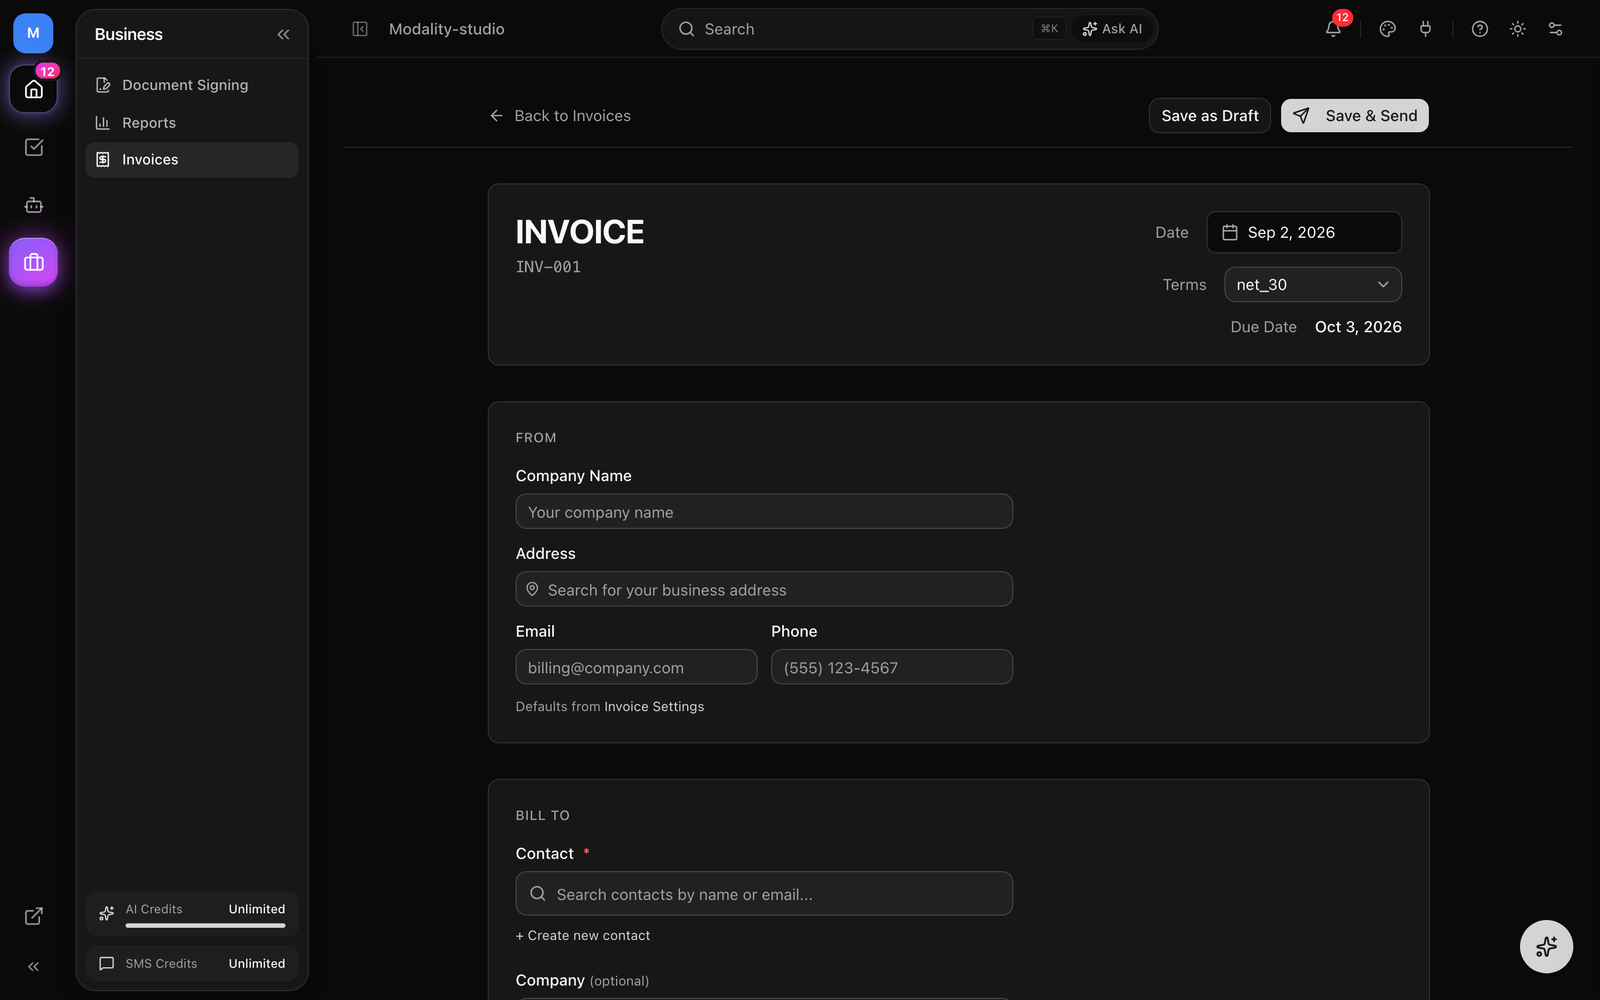
Invoices are created from a dedicated full-page builder laid out like a real invoice, a From block, a Bill To block, a line-item table, and a totals summary.
How to Create an Invoice
- 1
Navigate to Invoices
Click "Invoices" in the sidebar, then New Invoice. The builder opens with the next invoice number pre-filled (e.g.
INV-004) and today's date. - 2
Confirm the From details
The From block (your company name, address, email, and phone) pre-fills from Invoice Settings. Edit it inline for a one-off invoice if you need to.
- 3
Choose who you're billing
Search your CRM for a contact (or create one on the spot), and optionally attach a company record for the billing address. Add CC recipients who should receive copies of the invoice emails.
- 4
Add line items
Add one or more line items with a description, quantity, and rate. The amount per row and the subtotal update as you type. (You type dollars; amounts are stored internally in cents.)
- 5
Set discount, tax, terms, and due date
Enter an optional discount and tax as flat dollar amounts (see Discounts & Tax below), pick payment terms (Due on Receipt, Net 15, Net 30, Net 60, or Custom), and the due date is calculated for you, or pick it by hand on Custom. Add notes or terms at the bottom.
- 6
Save as draft or save & send
Save as Draft keeps it editable for later. Save & Send marks it sent, generates the public payment link, and emails the invoice to the contact (and any CC recipients).
Discounts & Tax
Both the discount and the tax on an invoice are entered as flat dollar amounts, not percentages or rates. The total is computed as:
Total = Subtotal − Discount + Tax
- Discount, a fixed amount subtracted from the subtotal (e.g. a $250 courtesy discount).
- Tax, a fixed amount added to the total (e.g. $84.00). Modality does not calculate tax from a rate or by jurisdiction; enter the amount you want to charge.
0, the total is simply the subtotal.Invoice Statuses
Every invoice carries a status that tracks where it is in its lifecycle:
- Draft, being prepared; not yet sent. Fully editable.
- Sent, emailed to the customer and awaiting payment.
- Partial, at least one payment recorded, but a balance remains.
- Paid, paid in full (amount paid reached the total).
- Overdue, the due date passed while a balance was still outstanding.
- Cancelled, you cancelled it with the Cancel button (a paid invoice can't be cancelled).
- Void, a voided state used for invoices retired programmatically (e.g. via the API); there is no Void button in the dashboard.
Transitions happen automatically as payments land: the first partial payment moves a Sent invoice to Partial, and reaching the full total moves it to Paid and stamps the paid date.
Deposit-First Payments
An invoice can require a deposit up front before the rest of the balance. When a deposit is set on an invoice, the public payment page collects exactly that deposit first, as a fixed amount the payer can't edit, and then lets them pay the remaining balance later on the same page.
- While the deposit is unpaid, the page shows "Deposit due now" with the deposit amount and a note that the remaining balance can be paid later.
- The payer can still choose "or pay the full balance now" instead of just the deposit.
- Once the deposit is covered, the page switches to showing the remaining balance due.
- The deposit is always capped at the invoice total, so it can never exceed what's owed.
Deposits are set when an invoice is generated by an automation, the create_invoice and create_invoice_from_submission actions both take a deposit amount (see Automation Integration). This powers "pay the deposit to hold your place, then pay the rest" flows for applications and bookings.
Screenshot: the public payment page in its deposit stage, the 'Deposit due now' panel with the fixed deposit amount, the primary 'Pay $X deposit' button, and the smaller 'or pay the full balance now' link beneath it.
Demo GIF / screenshot to be added
Recording Payments
Not every payment comes through the online page, you'll often take cash at the door or a check in the mail. Record those by hand so the invoice's balance stays accurate.
How to Record a Payment
- Open a Sent, Partial, or Overdue invoice and click Record Payment.
- Enter the amount received (in dollars).
- Choose a method: Manual, Cash, or Check.
- Add an optional note (e.g. a check number), then save.
The payment is logged in the invoice's Payment History with its amount, method, note, and timestamp. The amount paid increases and the invoice moves to Partial (or Paid, if the balance reaches zero) automatically.
stripe method once Stripe confirms them, you don't record those by hand. Those entries link out to the payment in the Stripe dashboard from the invoice's Payment History.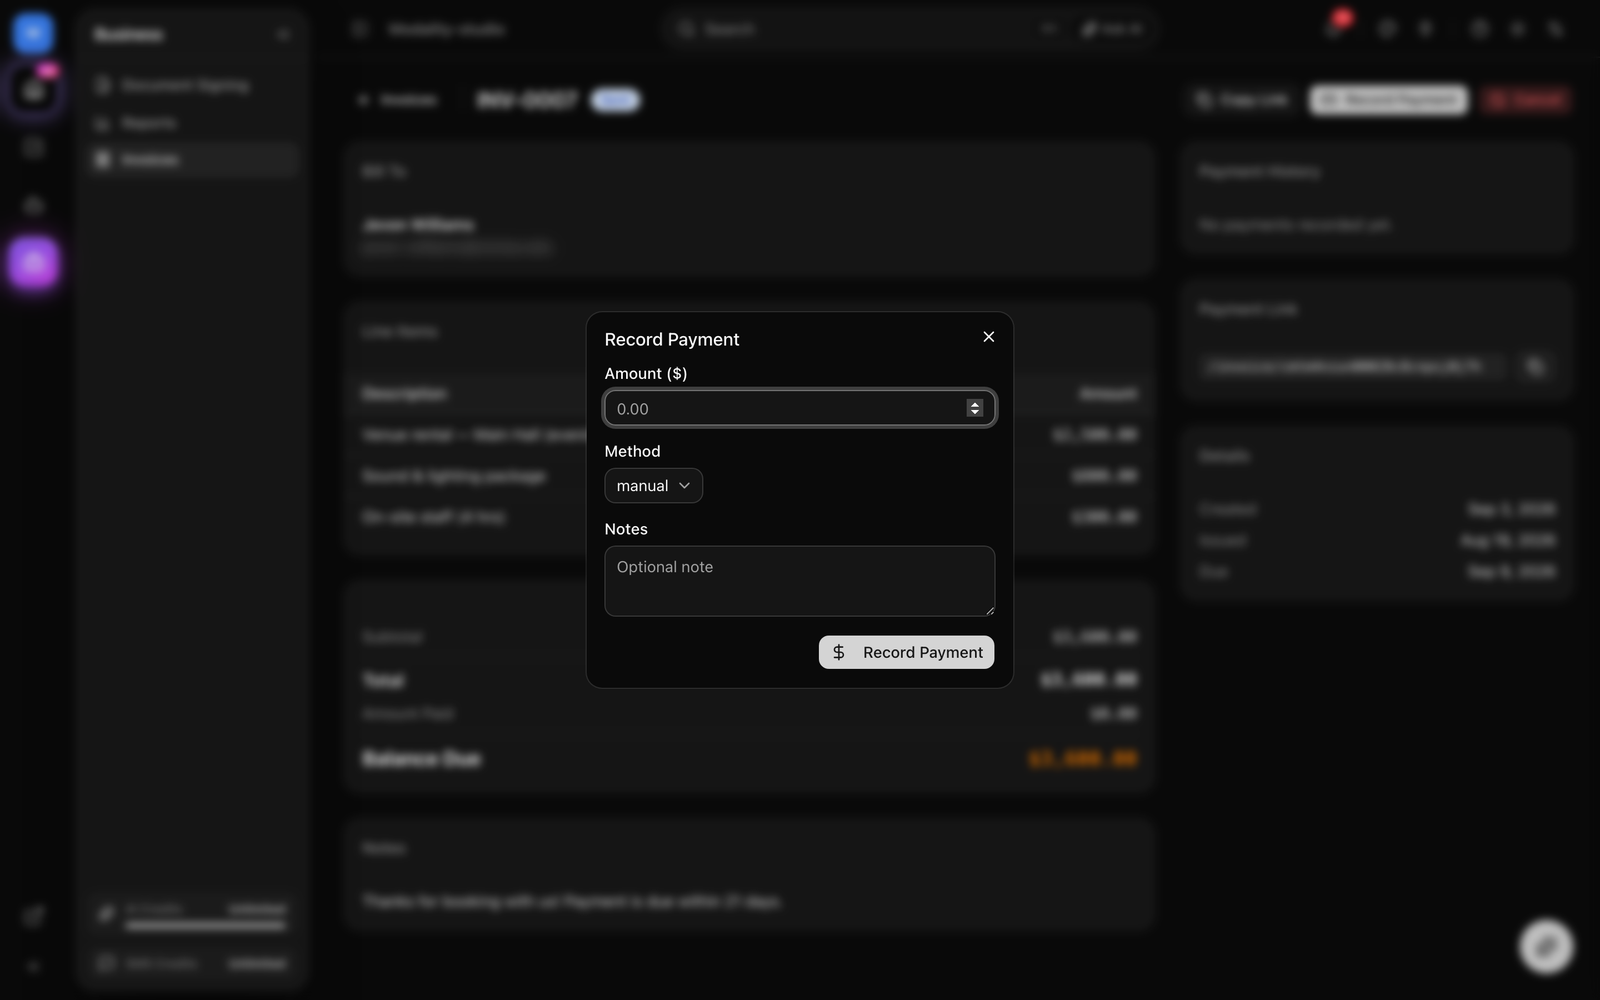
Partial Payments & Balances
Invoices support partial payments, so a customer can pay in installments, ideal for large orders, deposits, or payment plans.
- On the public payment page, the payer can pay the full balance or enter a custom amount.
- Any amount entered is automatically capped at the remaining balance, so a payment can never overshoot.
- Each payment (online or recorded by hand) is logged, and the remaining balance is shown everywhere the invoice appears.
- When the running total of payments reaches the invoice total, it flips to Paid.
Sending Invoices
Sending an invoice marks it Sent, stamps the issued date, and emails it to the contact. The email leads with the amount due and a prominent Pay Now button linking to the public payment page.
Email Delivery
- The invoice email goes to the contact's email address, with copies to any CC recipients on the invoice.
- The email is branded with your invoice settings, logo, accent color, and font (falling back to your brand kit).
- You can fully customize the email with a visual template and merge tags (see Invoice Settings).
- Reminder emails for overdue invoices reuse the same branding and template, with reminder framing in the subject.
Public Payment Page & Stripe Connect
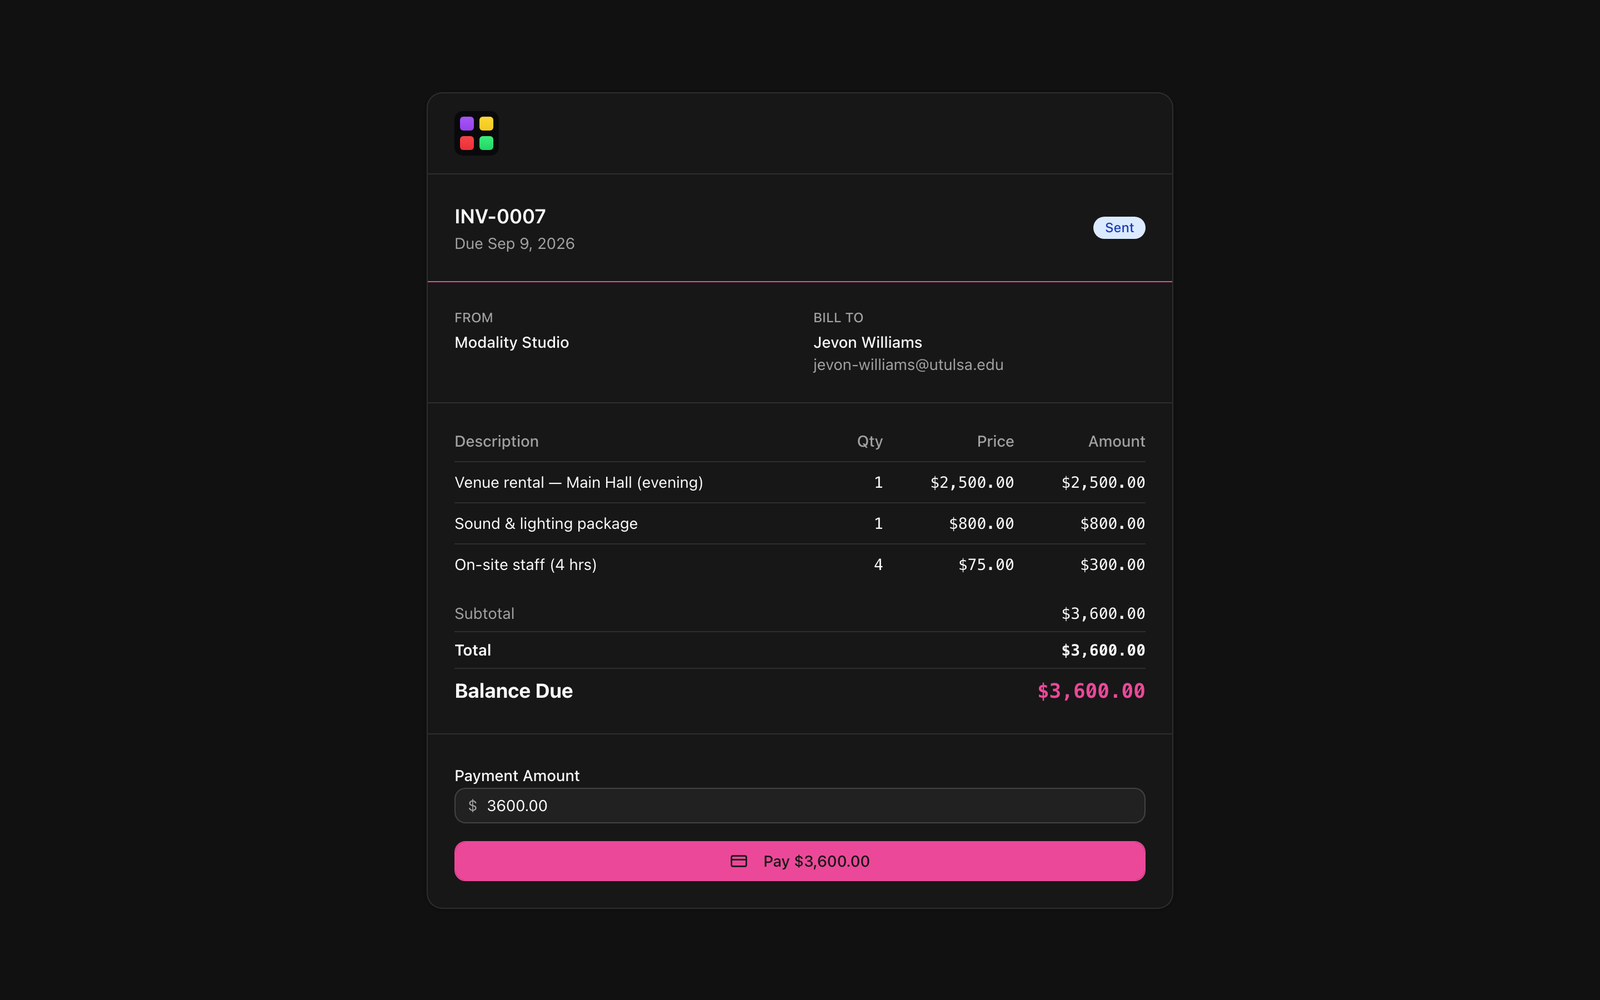
Each sent invoice has a public payment page at /invoice/[token]. This is where customers review the invoice and pay it. Copy the link any time from the invoice detail page.
What the Payment Page Shows
- Your logo, company name, and branding, plus the From / Bill To details.
- Full line items with quantities and prices, and the Subtotal / Discount / Tax / Total breakdown.
- Amount already paid and the remaining balance due.
- Either a fixed deposit prompt (deposit stage), or a payment-amount field to pay in full or in part.
- A secure Stripe card checkout, and a success confirmation after payment.
Payments Run Through Your Connected Stripe Account
Invoice card payments are direct charges on your workspace's connected Stripe account, the money goes to you, not to the platform. The platform's service fee is added as a separate "Service fee" line in the Stripe checkout and collected as an application fee on top of the invoice amount.
Invoice Settings
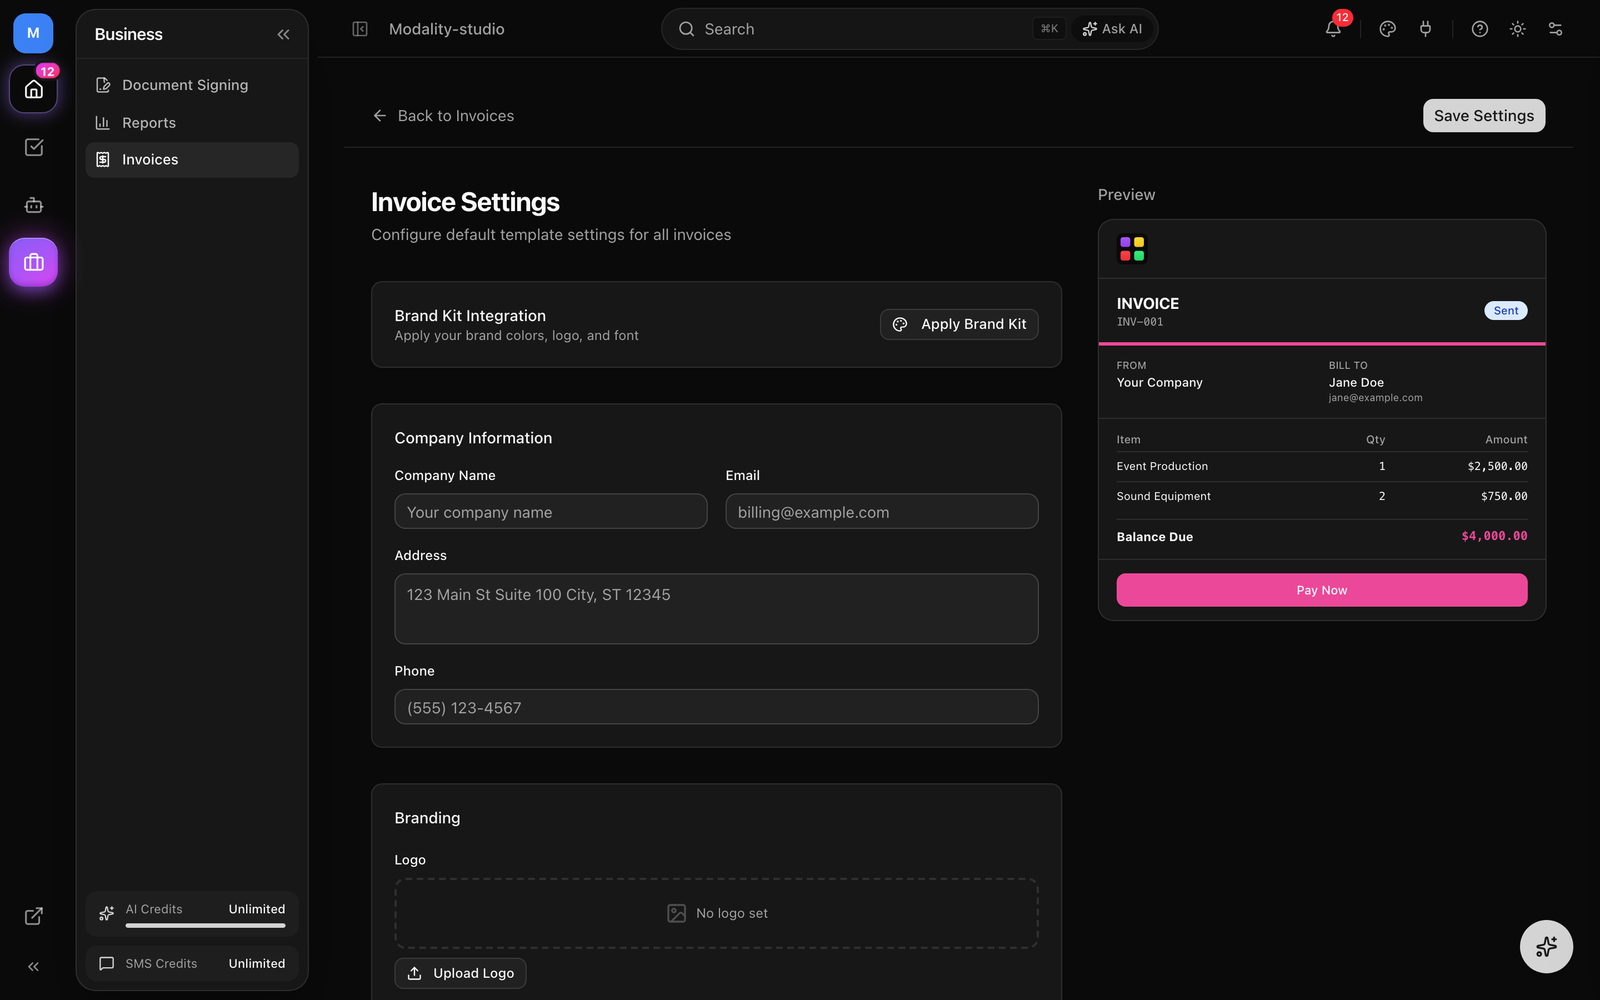
Configure defaults and branding for every invoice from Invoices → Settings. A live preview on the right updates as you edit.
Company Information
Set your company name, email, address, and phone. These pre-fill the From block on new invoices and appear on the invoice email and public payment page.
Branding
Set a logo, accent color, and font for invoices, or click Apply Brand Kit to pull them from your workspace brand kit. This branding is applied to invoice emails and the public payment page.
Default Terms & Messages
Choose default payment terms (Due on Receipt, Net 15, Net 30, or Net 60) that are pre-selected on new invoices, plus a default header message, footer text, and default notes that appear on every invoice.
Email Template & Merge Tags
Customize the invoice email with the visual editor, or leave it on the built-in default. The following merge tags are replaced when the email is sent:
{{invoice_number}}, the invoice number (e.g. INV-001){{invoice_total}}, the total amount, formatted as currency{{invoice_balance}}, the current balance due{{invoice_due_date}}, the due date{{contact_name}}, the recipient's name{{company_name}}, your company name{{pay_now_link}}, the raw payment-page URL{{pay_now_button}}, a pre-styled "Pay Now" button (HTML)
Automation Integration
Invoices are wired into the automations engine, so you can create, send, and follow up on invoices without touching them by hand.
Invoice Triggers
- invoice_created, fires when a new invoice is created
- invoice_sent, fires when an invoice is sent to the contact
- invoice_paid, fires when an invoice is fully paid
- invoice_overdue, fires when an overdue invoice is nudged past its due date
- invoice_partial_payment, fires when a partial payment is received
Invoice Actions
- create_invoice, creates a draft invoice from line items you specify, with optional due date, notes, a per-record discount pulled from an attribute, and an optional deposit amount.
- create_invoice_from_submission, creates a draft invoice priced from the contact's latest form submission (its product/price selections), so a dynamically-priced application becomes a correctly priced invoice. Also supports a deposit amount.
- send_invoice, sends the contact's most recent draft invoice.
- send_invoice_email, sends a branded email with the invoice details and payment link for the contact's most recent unpaid invoice (used for reminders, thank-yous, etc.).
Use Case: Application Deposit, Then Balance
A common workflow is pricing an application from a form, invoicing it with a deposit due first, and letting the applicant pay the rest later. Here's how the pieces fit:
- 1
Build a priced application form
Create a form with product/price fields (e.g. package or room-type choices) so each submission carries a calculated total.
- 2
Invoice from the submission with a deposit
On a "form submitted" (or status-change) automation, add a create_invoice_from_submission action with a deposit amount, then a send_invoice action to deliver it. The public page will collect the deposit first.
- 3
React when the deposit lands
The first payment fires invoice_partial_payment; the applicant returns to the same page to pay the remaining balance whenever they're ready.
- 4
Close the loop on full payment
When the balance is cleared, invoice_paid fires, attach a thank-you email, a tag, or the next step in your workflow.
Managing Invoices
The invoices list is the hub for tracking everything you've billed.
Summary Cards
Four cards summarize the current state of your billing:
- Outstanding, total (and count) of all Sent and Partial invoices awaiting payment.
- Overdue, total (and count) of invoices past their due date.
- Paid This Month, total (and count) of invoices marked paid since the start of the current month.
- Drafts, the number of unsent draft invoices.
Finding & Filtering
- Status tabs across the top: All, Draft, Sent, Partial, Paid, Overdue.
- Filter by a date range to focus on a specific period.
- Search by invoice number or by the contact's name or email.
- Click any invoice to open its full detail, line items, totals, payment history, and dates.
Editing Invoices
Draft invoices are fully editable, the Edit button appears only while an invoice is a draft. Once an invoice has been sent, it isn't edited in place: to correct a sent invoice, Cancel it and create a new one. Recording payments, sending, and copying the payment link stay available after sending.