Settings
Settings is your workspace control center. From here you manage your workspace identity and regional defaults, invite teammates and set their roles, shape your data model with custom objects and fields, verify sending domains, watch deliverability, tune notifications and lead scoring, lock down privacy, handle billing, and issue API keys.
Open Settings from the sidebar. The page is organized into tabs across the top, General, Team, Objects, Fields, Domains, Deliverability, Notifications, Lead Scoring, Privacy, Billing, and API. You can deep-link to any tab with ?tab= (for example /settings?tab=billing). SMS provider setup lives on its own page (see SMS Settings at the end).
General
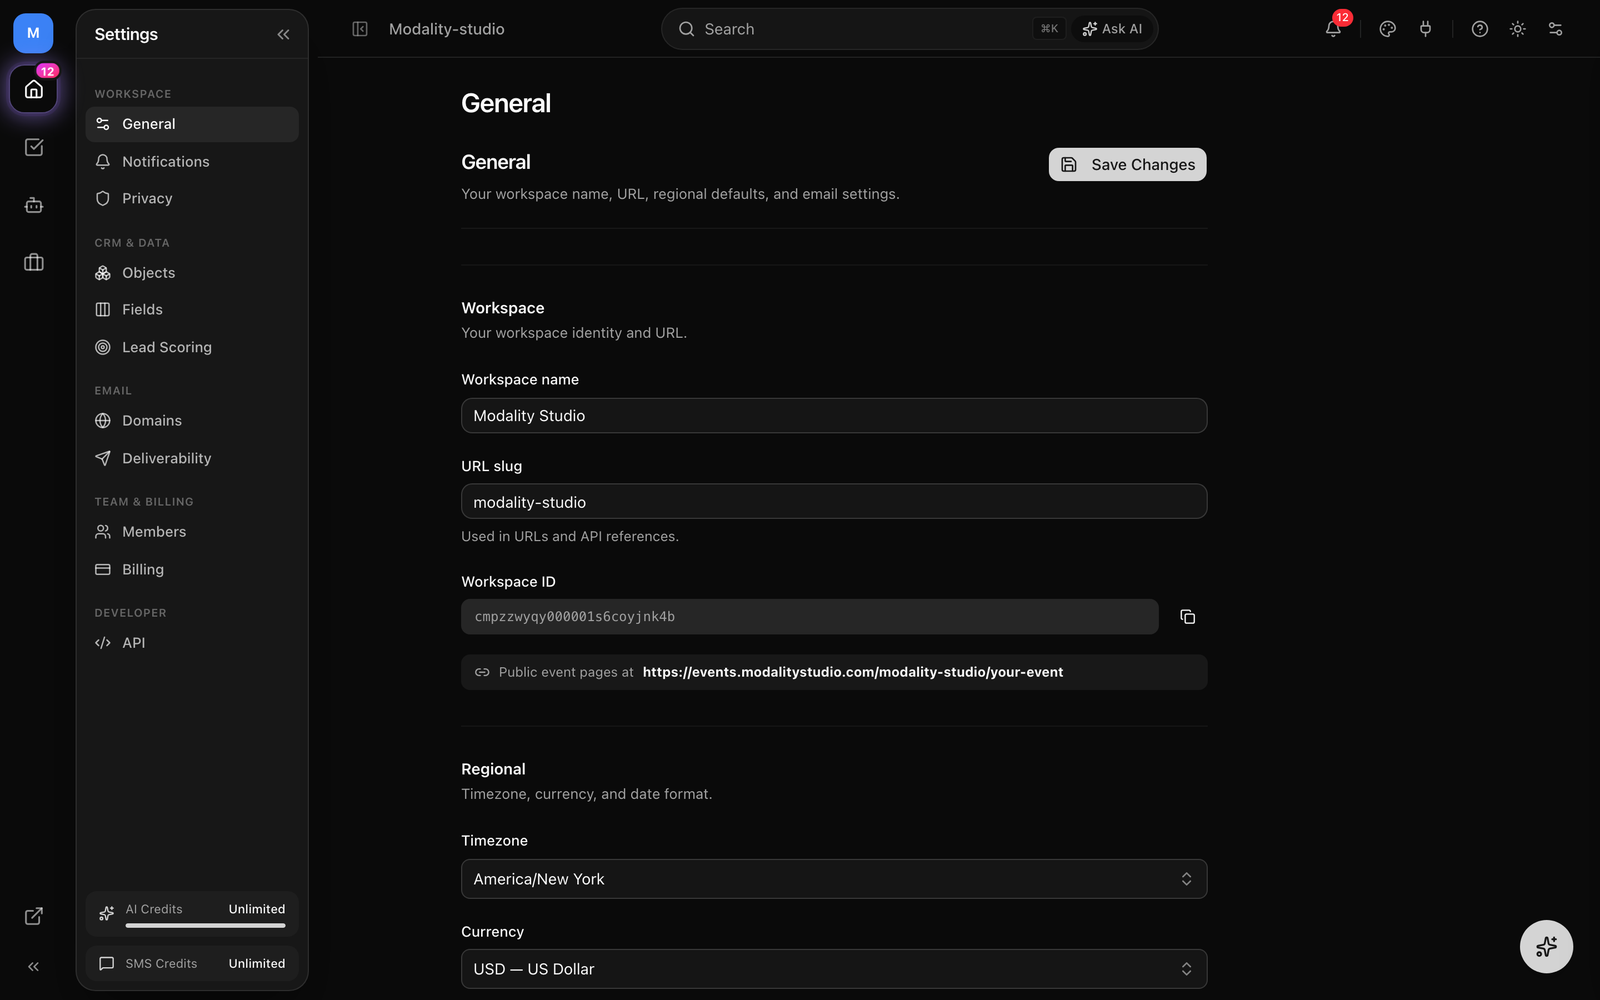
The General tab holds workspace-level configuration, split into cards. Changes across the top cards are staged and applied together with the Save Changes button near the bottom.
Workspace identity
- Workspace Name, appears in the sidebar, email sender names, and elsewhere across the app.
- URL Slug, used in dashboard URLs and public event page addresses. Editing it is validated to lowercase letters, numbers, and hyphens. If you change the slug and save, you're redirected to the new URL.
- Workspace ID, a read-only CUID with a copy button, useful for support and API references.
- A helper line shows where your public event pages live:
your-workspace/your-event.
Regional
- Timezone, affects campaign scheduling, event times, and report date ranges.
- Currency, the default currency for ticket pricing and payment fields (USD, EUR, GBP, CAD, AUD, JPY, INR, BRL, MXN, NGN, ZAR, AED).
- Date Format, MM/DD/YYYY (US), DD/MM/YYYY (EU), or YYYY-MM-DD (ISO).
Defaults
- New Events Start As, Draft or Published.
- New Forms Start As, Draft or Published.
Email & Compliance
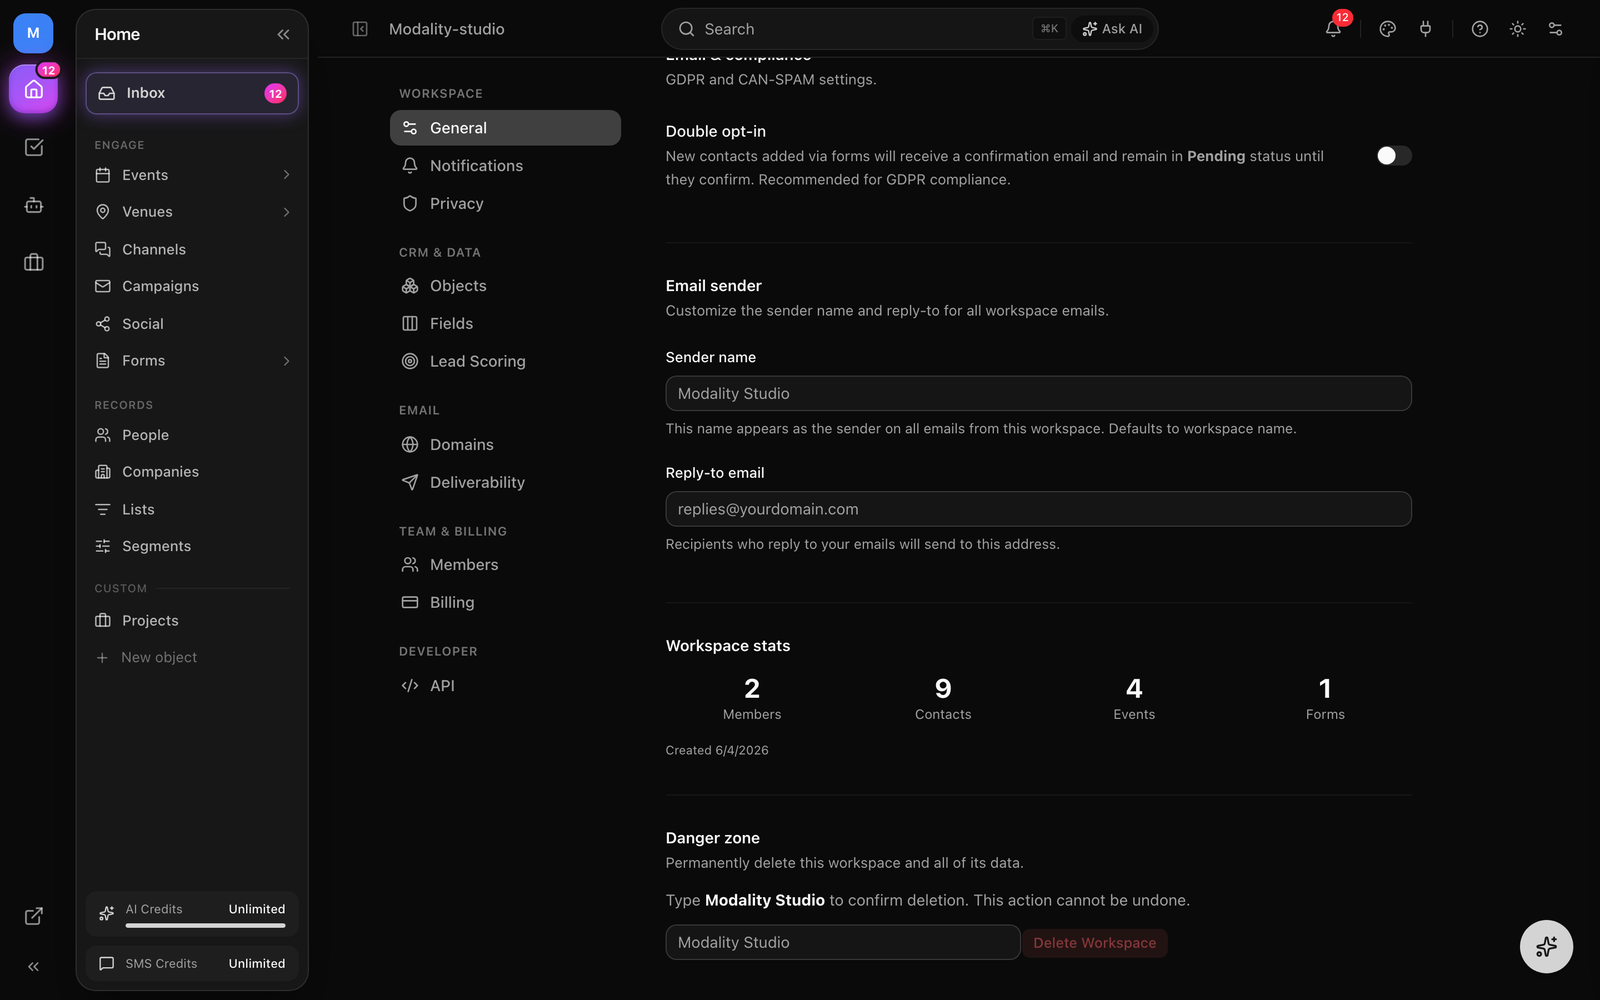
A single Double opt-in toggle. When on, new contacts added via forms receive a confirmation email and stay in Pending status until they confirm, recommended for GDPR. See Compliance for details.
Email Sender
- Sender Name, the "From" name on all emails from this workspace. Defaults to the workspace name if left blank.
- Reply-To Email, where replies to your emails are directed.
Workspace stats & Danger Zone
Below Save, a stats card shows member, contact, event, and form counts plus the workspace creation date. The Danger Zone permanently deletes the workspace and all its data, you must type the workspace name to confirm, and the action cannot be undone.
Team
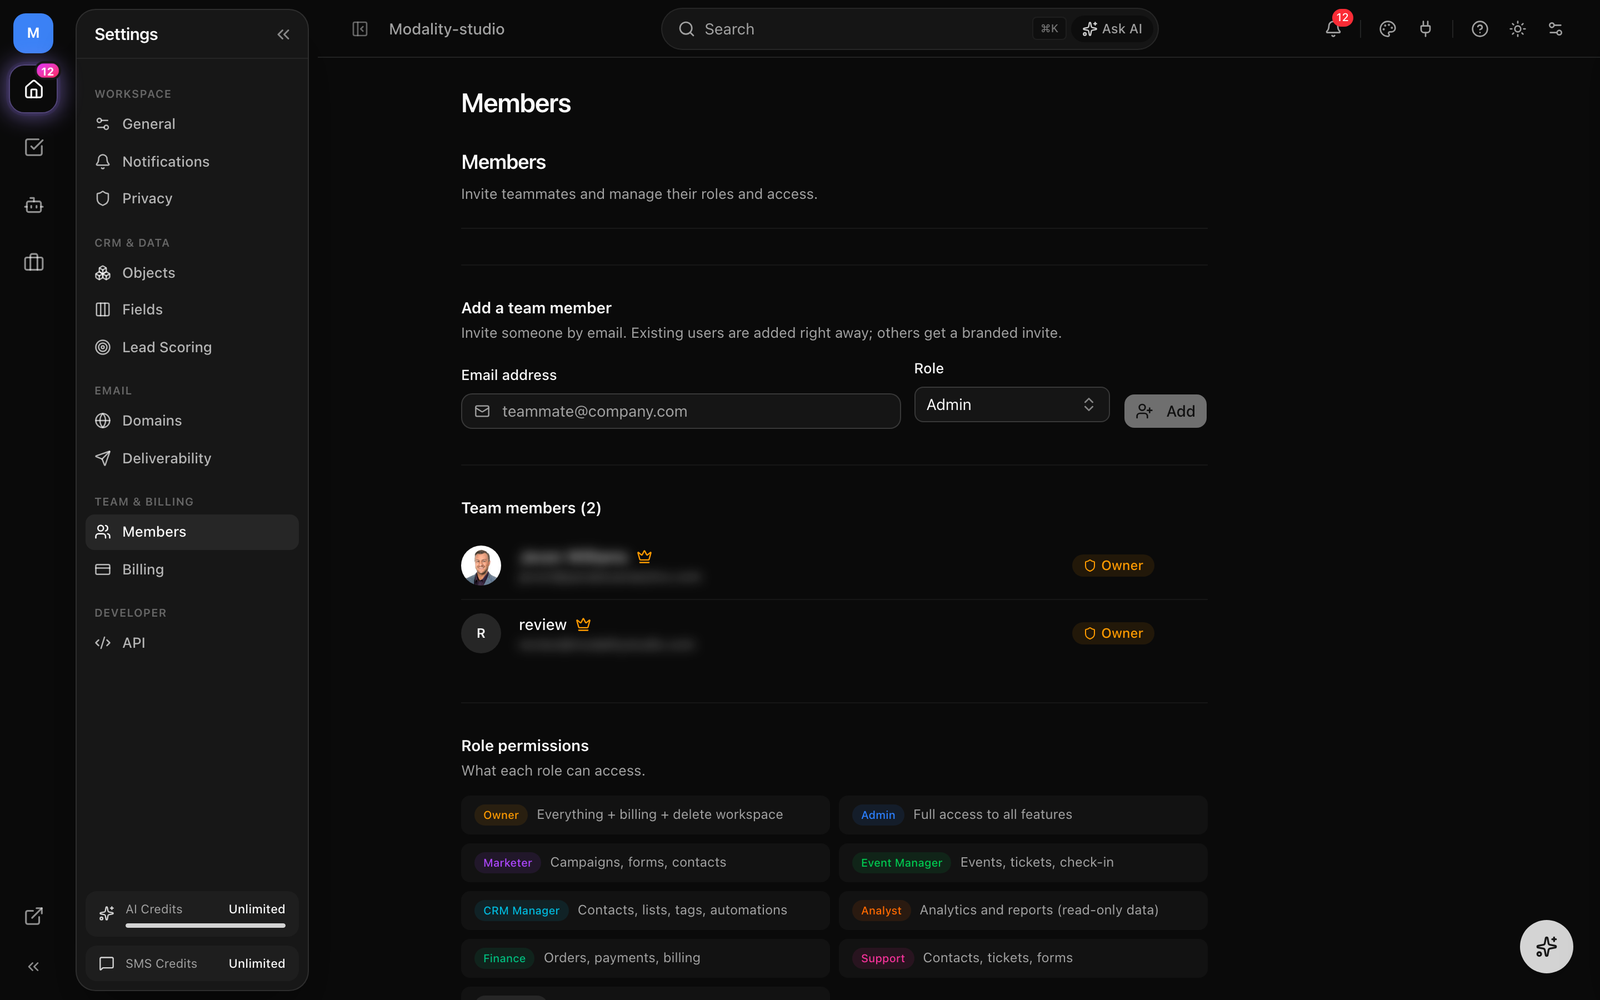
Add teammates and assign roles to control what each person can access.
Adding a team member
- 1
Open the Team tab
Go to Settings → Team. The members list shows everyone in the workspace with their avatar, name, email, and role.
- 2
Enter an email and pick a role
In the "Add Team Member" card, type the person's email and choose a role from the dropdown, then click Add. The person must already have a Modality account to be added.
- 3
Adjust or remove later
Change any member's role inline with the role dropdown next to their name. To remove someone, click the trash icon and then Confirm.
Roles
Every workspace has exactly one Owner (shown with a crown; the role can't be changed or removed here). New members can be assigned any of the following roles:
- Owner, everything, including billing and workspace deletion.
- Admin, full access to all features.
- Marketer, campaigns, forms, contacts.
- Event Manager, events, tickets, check-in.
- CRM Manager, contacts, lists, tags, automations.
- Analyst, analytics and reports (read-only data).
- Finance, orders, payments, billing.
- Support, contacts, tickets, forms.
- Read Only, view everything, edit nothing.
Objects
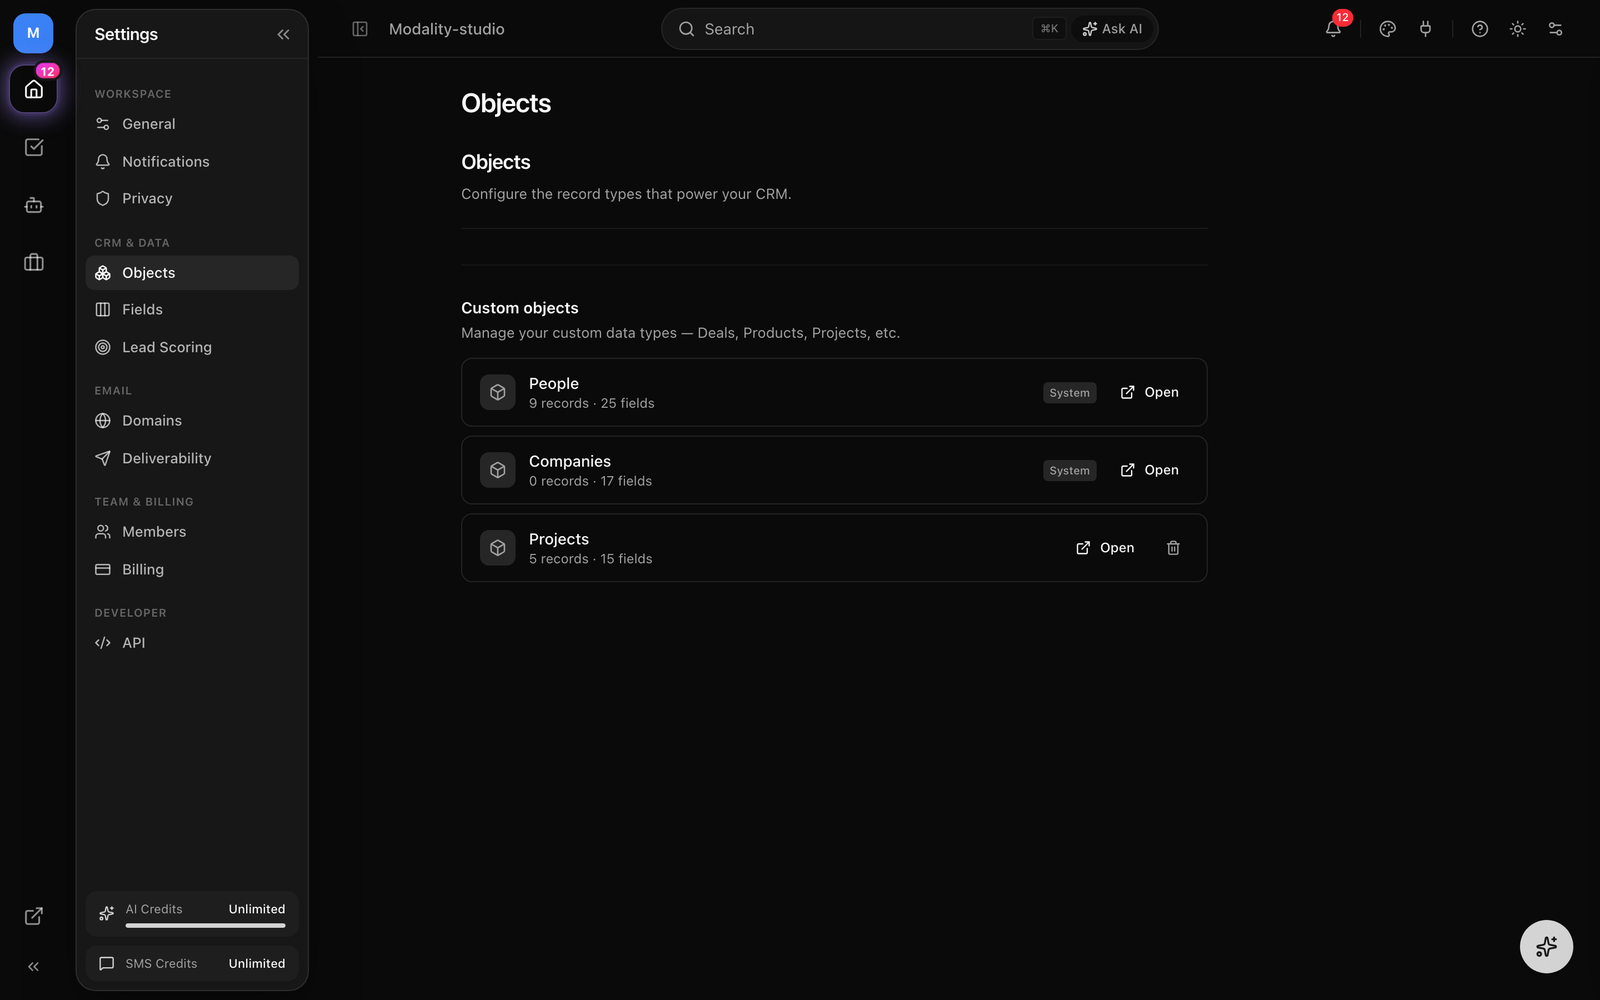
The Objects tab manages your custom data types, the object types that power your CRM beyond People, such as Deals, Products, or Projects. Each row shows the object's record count and field count.
- Open, jump to the object's records view.
- System objects, standard objects are tagged System and can be opened but not deleted.
- Delete a custom object, only non-system objects show a trash icon. Deleting removes the object type and all records inside it; you must type the object's name to confirm.
New custom objects are created from the sidebar or by asking the AI assistant, not from this tab, Objects is the place to review and remove them. See Custom Objects for building them.
Fields
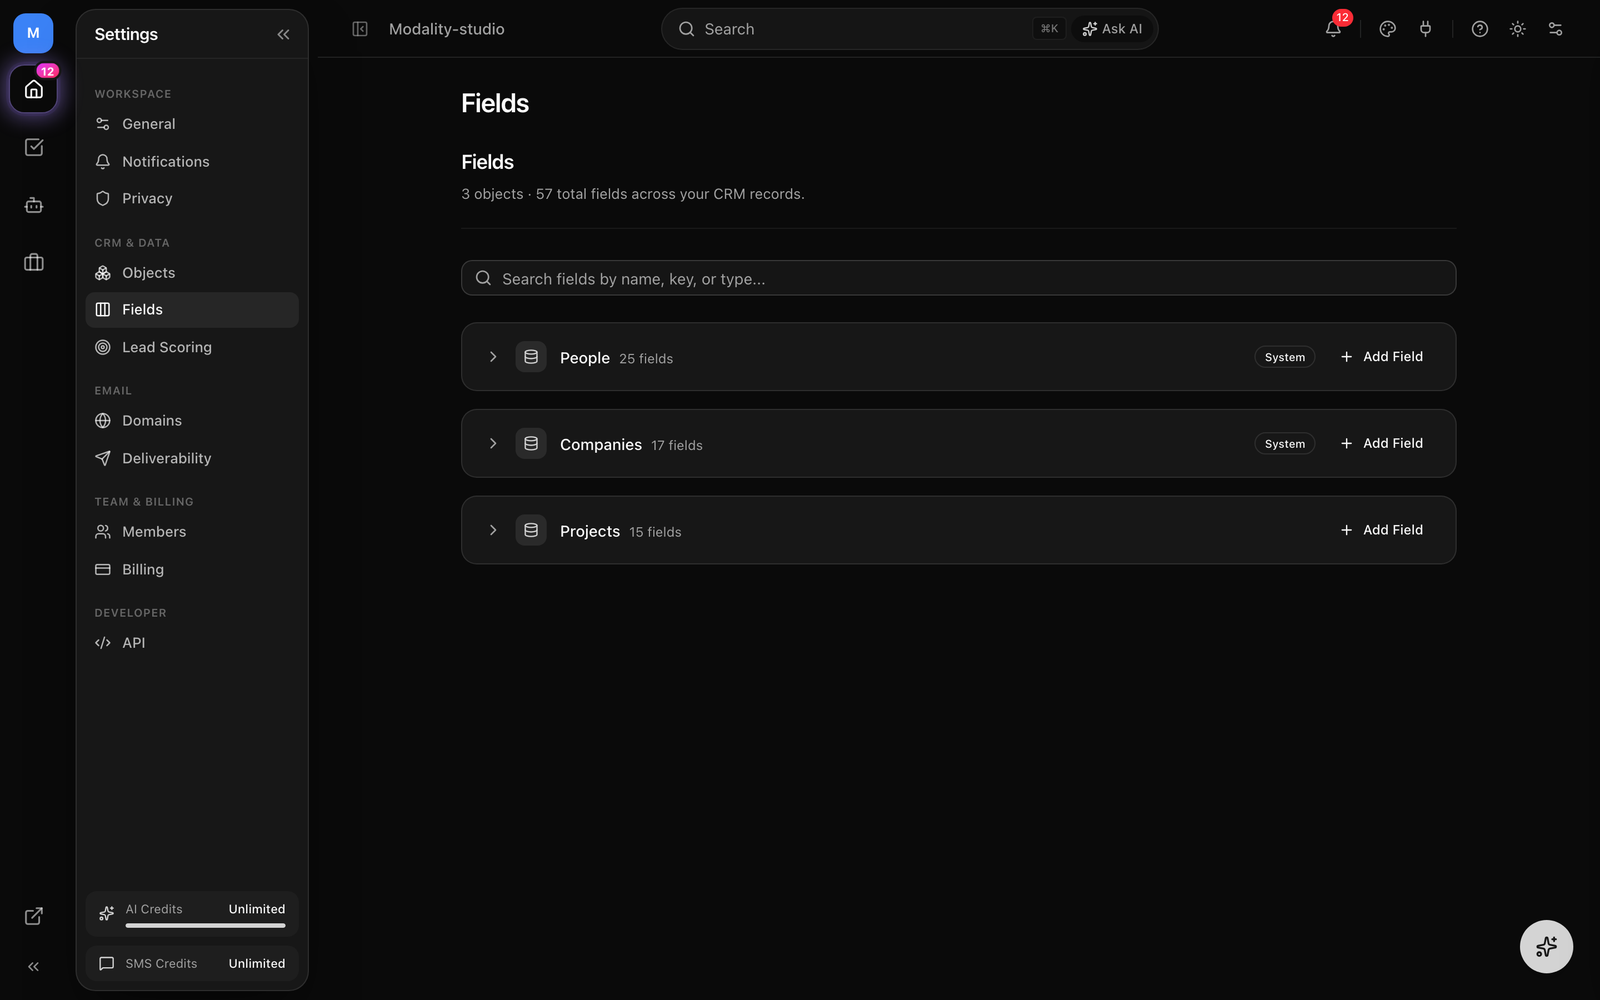
The Fields tab is a single place to manage the attributes (fields) on every object type. Object types are shown as collapsible sections; a header line reports the total object and field counts, and a search box filters fields by name, key, or type.
Adding a field
- Expand an object section and click Add Field.
- Enter a Field Name. A Field Key is auto-generated (must start with a letter and contain only letters, numbers, and underscores); you can override it.
- Pick a Type and optionally mark the field Required, then click Add Field.
Editing & deleting
Each field row shows its name, key, type, and whether it's Required, Unique, or the Primary (title) field. Use the pencil icon to edit the name, type, and the Required / Unique / Primary flags inline; the trash icon deletes a field. Deleting a field permanently removes all data stored in it.
Field types cover the full range of the data model, including Text, Long Text, Number, Currency, Percent, Rating, Date, Date & Time, Checkbox, Select, Multi Select, Email, Phone, URL, Location, Name, Relationship, Record Ref, AI Generated, Calculated, File, Image, JSON, Interaction, and Team Member.
Domains
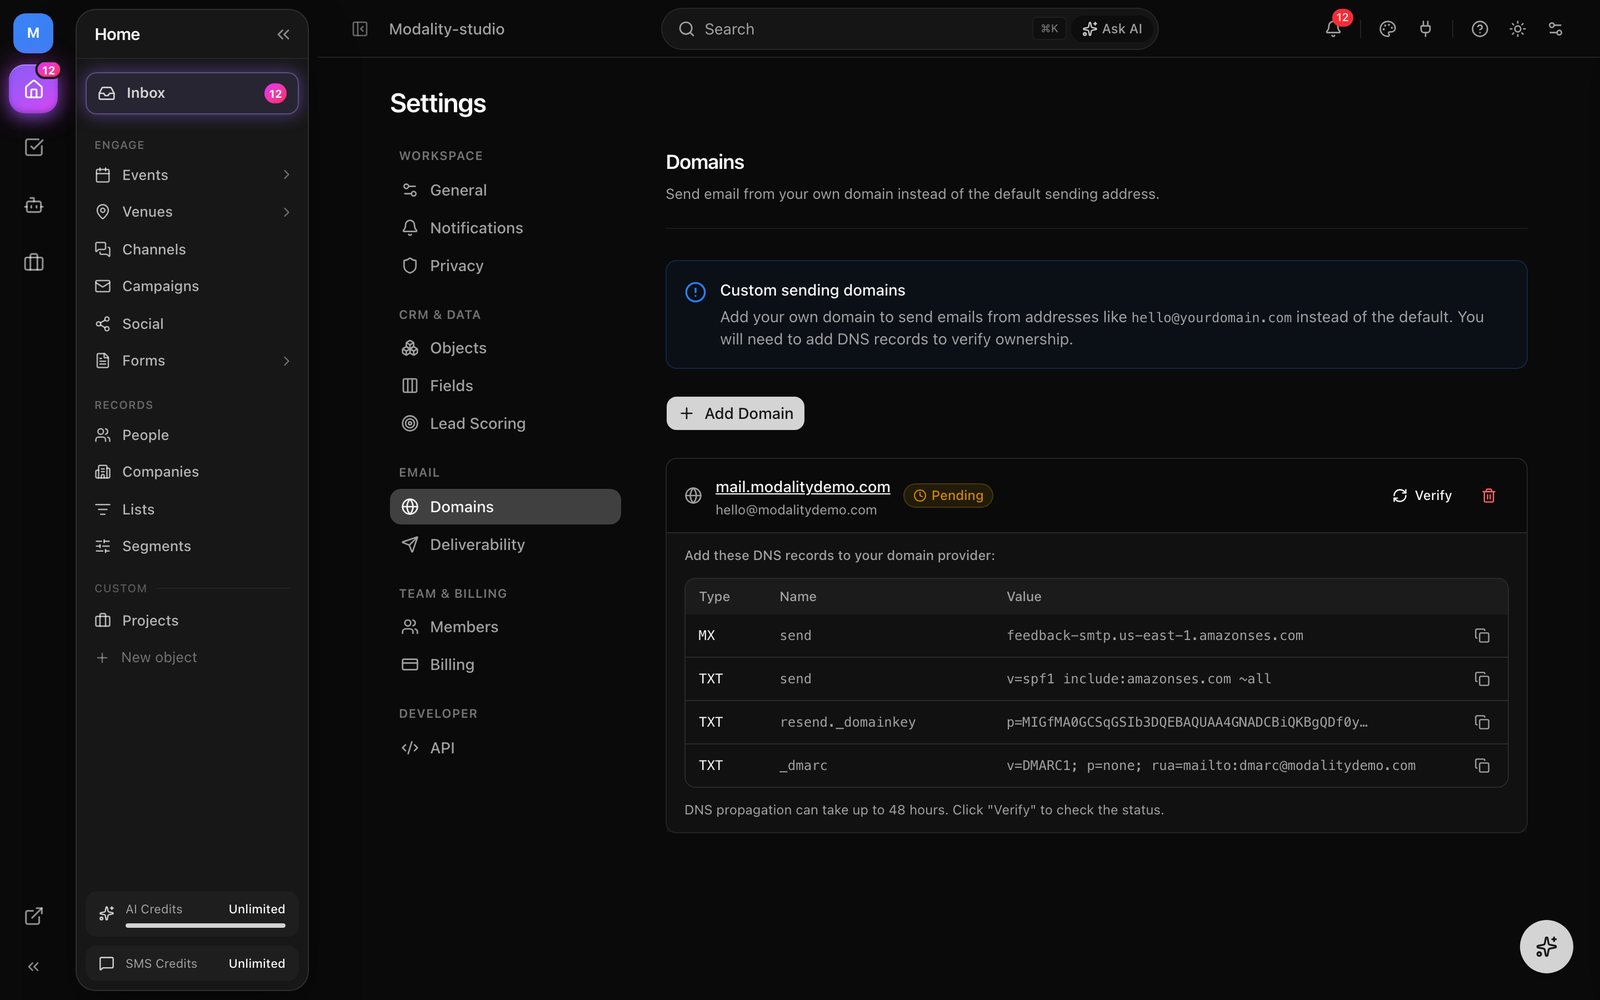
Add your own sending domain so campaign and transactional emails come from an address like hello@yourdomain.com instead of the default. Verification is done by adding DNS records.
- 1
Add a domain
Click Add Domain and enter your domain (e.g.
mail.yourdomain.comoryourdomain.com). - 2
Copy the DNS records
Expand the domain to see the required DNS records (type, name, value). Each value has a copy button. Add them at your DNS provider.
- 3
Verify
Click Verify to check propagation. Status moves through Pending → Verified / Active, or Failed if the records don't match. DNS can take up to 48 hours to propagate.
Remove a domain any time with the trash icon. Custom domains are a Business-plan capability, see Billing below.
Deliverability
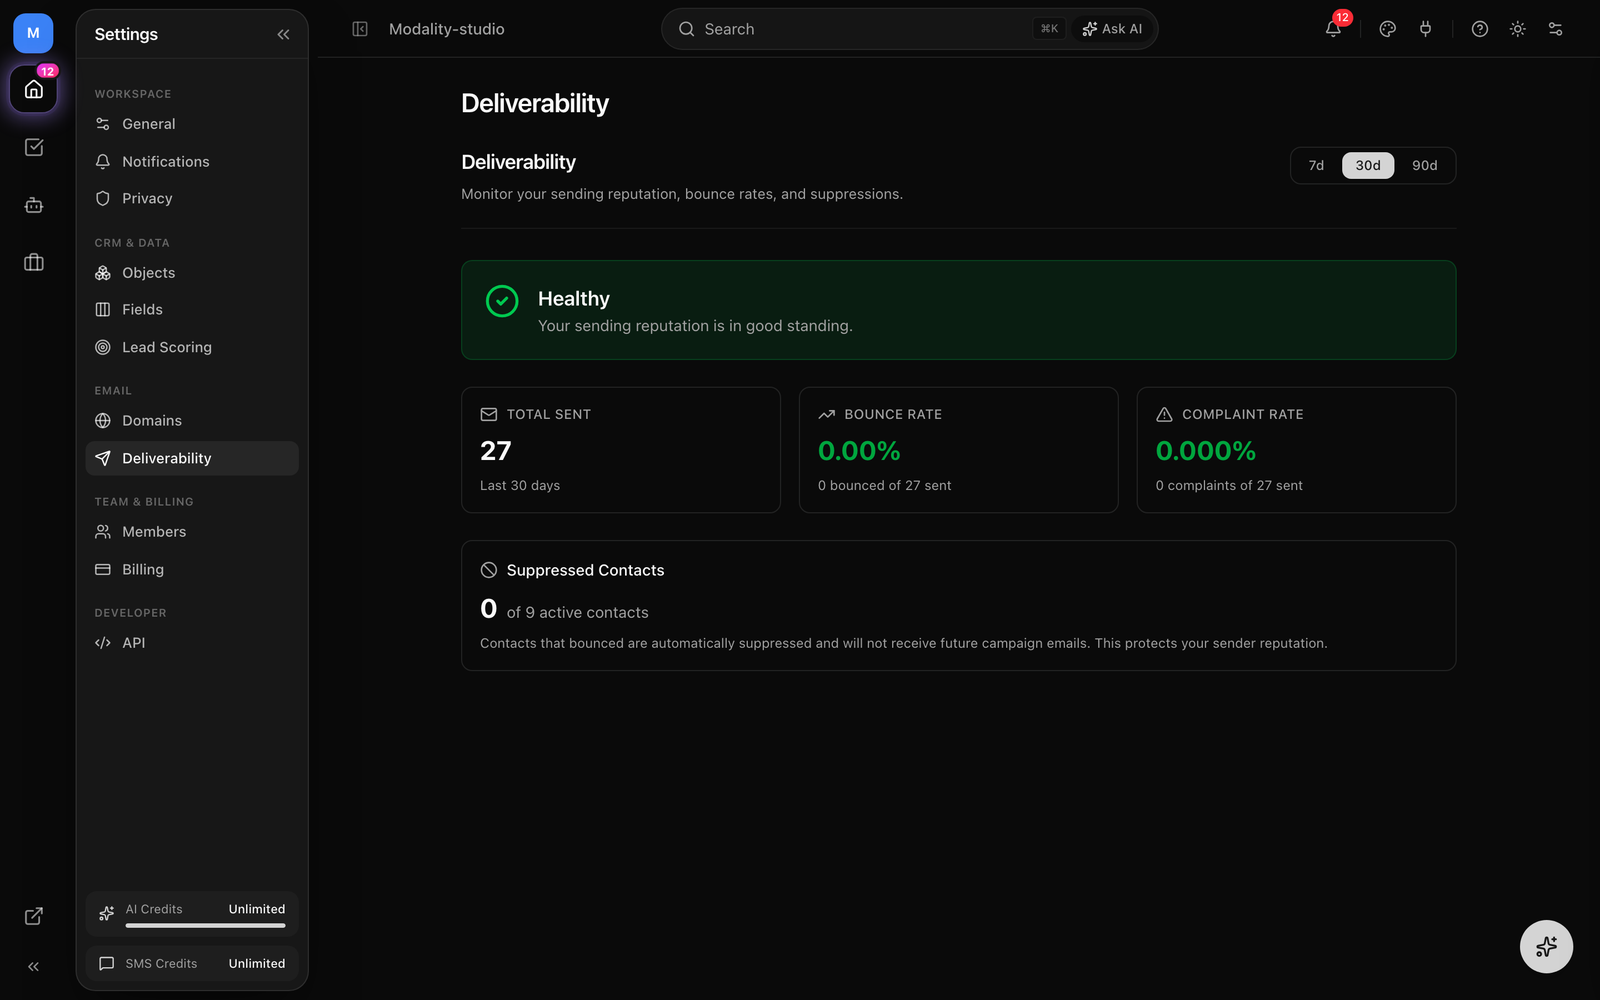
The Deliverability tab monitors your sending reputation over a selectable window (7, 30, or 90 days). At the top, an overall health status reads Healthy, Warning, or Critical.
- Total Sent, emails sent in the period.
- Bounce Rate, bounced ÷ sent, color-coded (warning around 3%, critical around 5%).
- Complaint Rate, spam complaints ÷ sent, color-coded at much lower thresholds.
- Warnings, specific guidance appears when a metric approaches its threshold.
- Suppressed Contacts, contacts that bounced are automatically suppressed and won't receive future campaign emails, protecting your reputation. The count is shown against your active-contact total.
- Recent Bounces, a table of recent bounced recipients (email addresses are redacted), with subject, template, and date.
Notifications
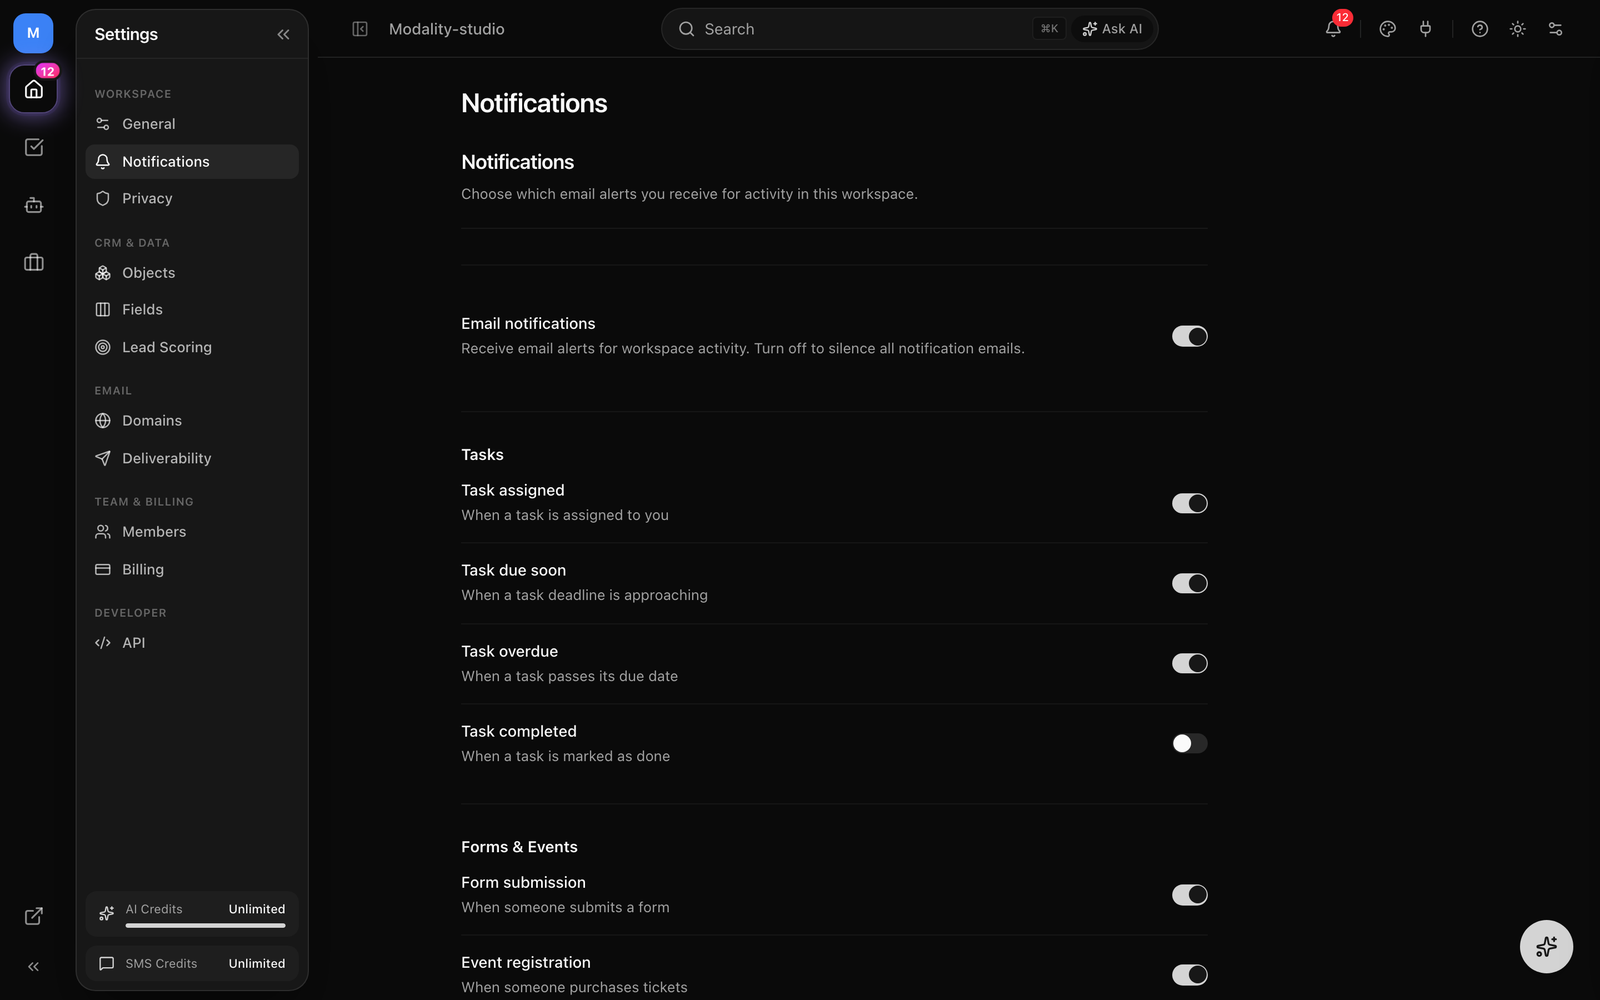
Control the email notifications you receive for workspace activity. A master Enable email notifications switch turns everything on or off; when on, per-type switches are grouped into categories. Changes save automatically as you toggle.
- Tasks, task assigned, due soon, overdue, and completed.
- Forms & Events, form submission, event registration (ticket purchase), and event risk alerts (competing events / risks detected near your events).
- Activity, note added.
- System, automation triggered, campaign sent, contacts imported, and system alerts.
Lead Scoring
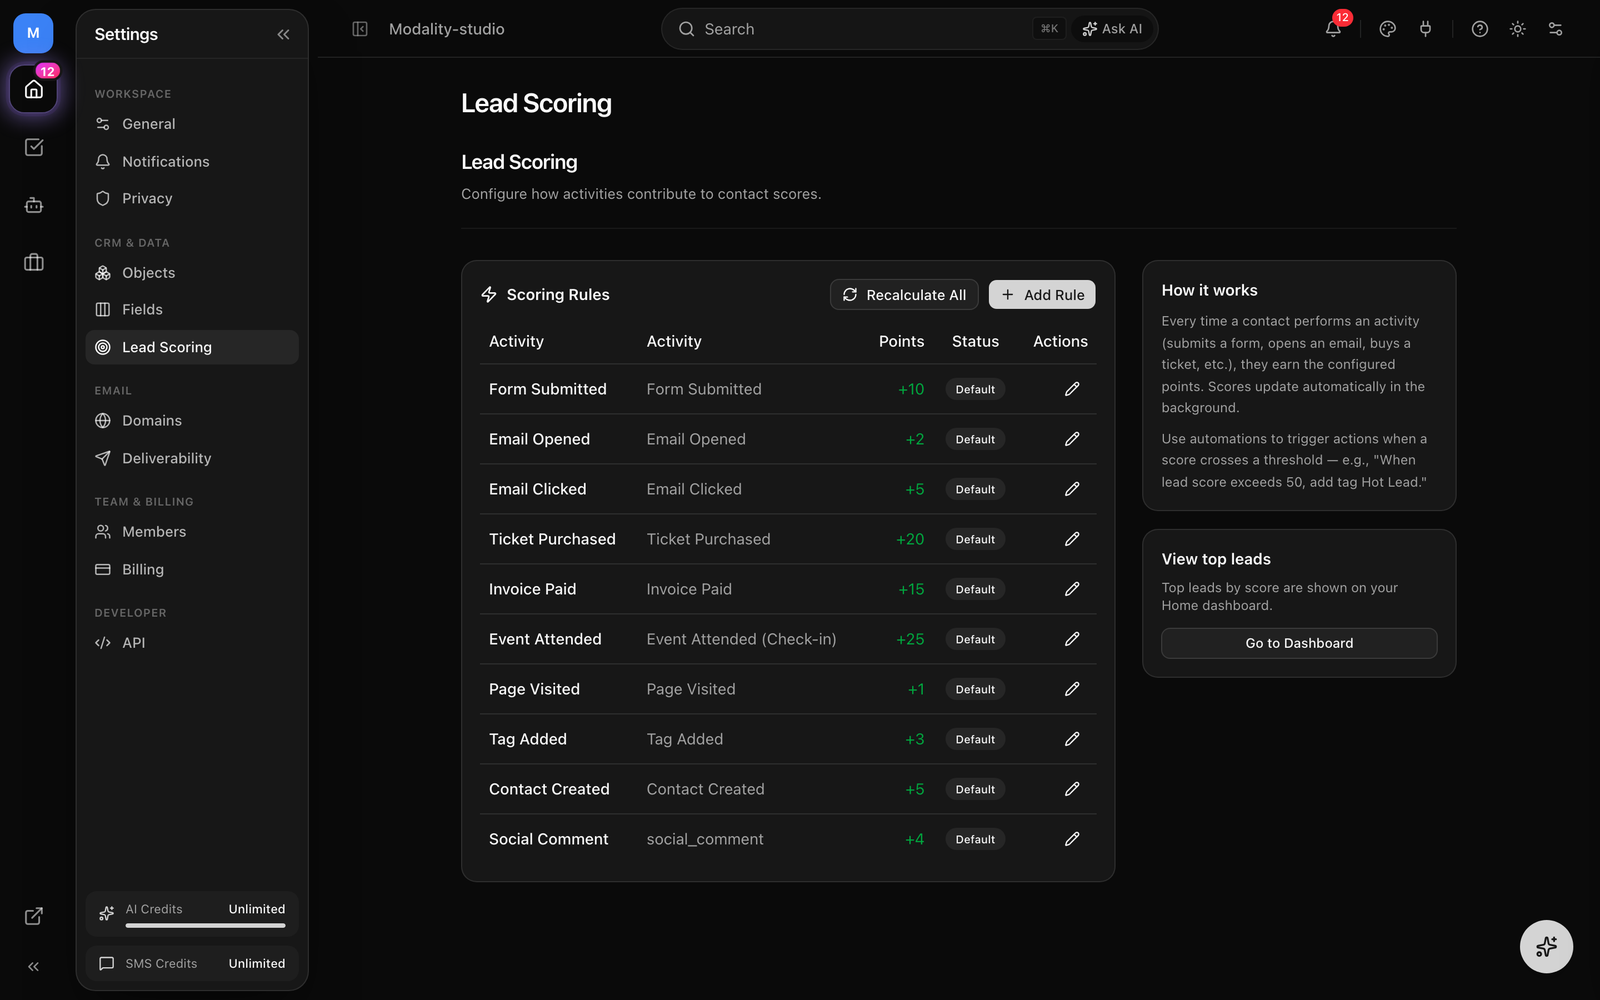
Configure how activities add (or subtract) points from a contact's lead score. Scores update automatically in the background as contacts act.
- Add a rule, click Add Rule, name it, pick an Activity (form submitted, email opened/clicked/sent, ticket purchased, event attended, invoice paid, payment completed, contact created/updated, tag added/removed, page visited, RSVP submitted, comment posted, review submitted), and set the Points.
- Negative points, use a negative value for score decay.
- Default rules, built-in rules are tagged Default; custom rules can be toggled active/inactive, edited, or deleted.
- Recalculate All, re-run scoring across all contacts after changing rules.
Pair lead scoring with Automations to act on thresholds, e.g. "when lead score exceeds 50, add tag Hot Lead." Top leads by score appear on your Home dashboard.
Privacy & Data Protection
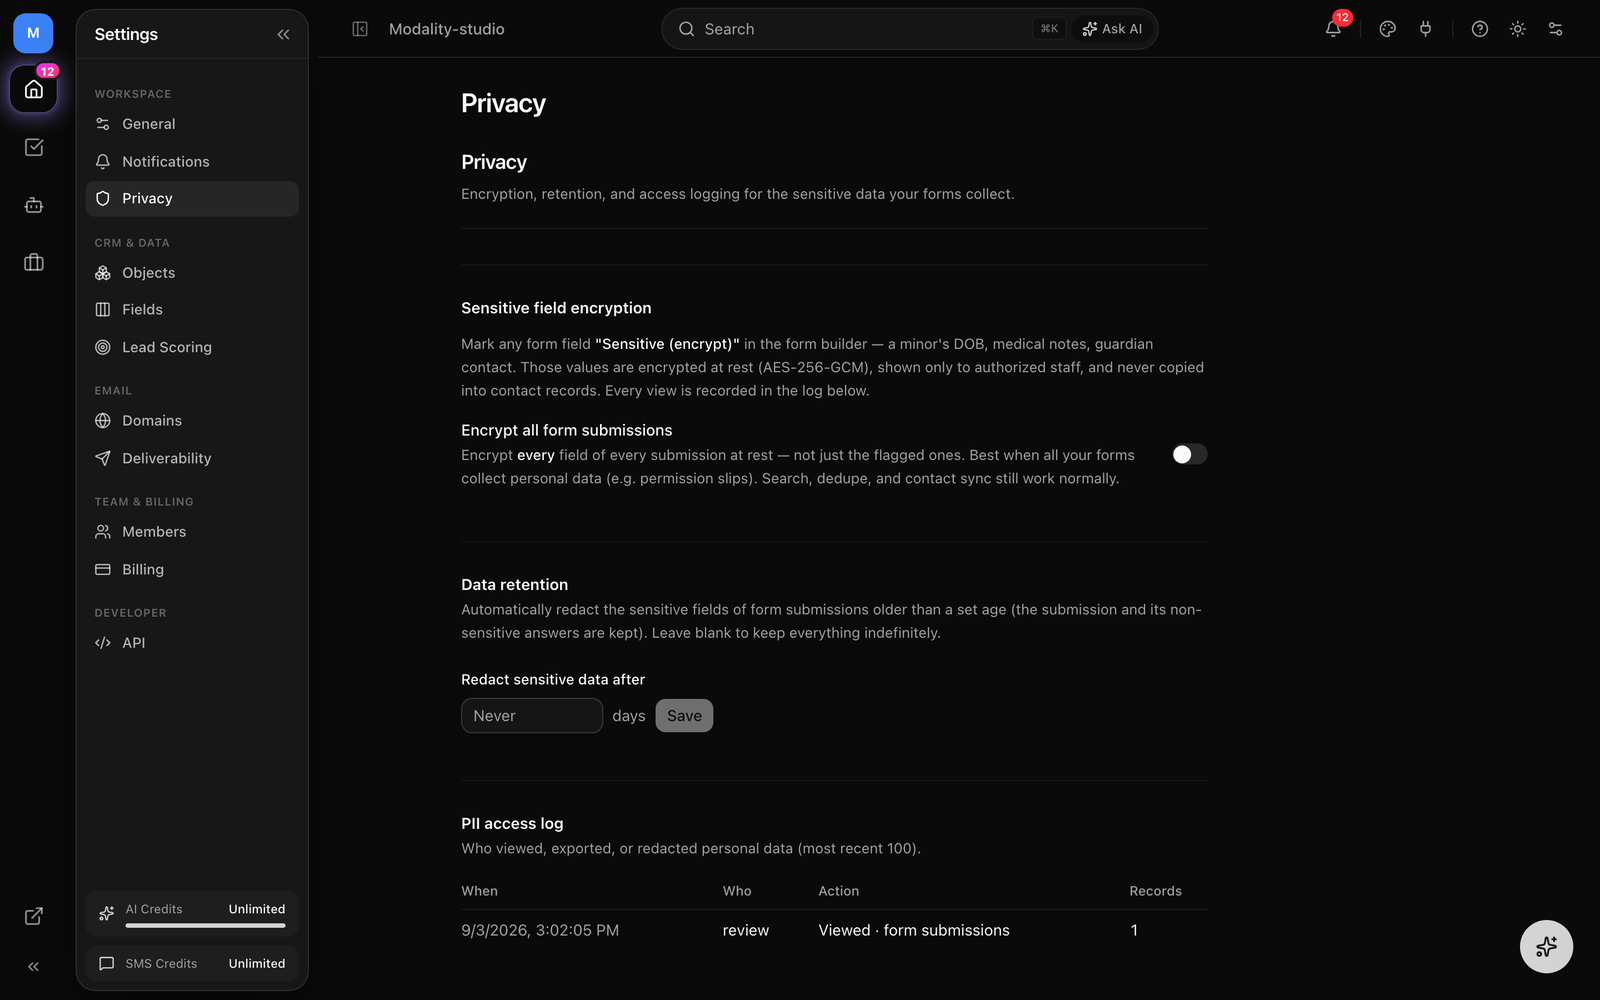
The Privacy tab governs how sensitive personal data is encrypted, retained, and audited, useful for forms that collect PII such as a minor's DOB, medical notes, or guardian contact details.
Sensitive field encryption
Any form field can be marked "Sensitive (encrypt)" in the form builder. Those values are encrypted at rest with AES-256-GCM, shown only to authorized staff, and never copied into contact records. An Encrypt all form submissions switch extends this to every field of every submission, best when all your forms collect personal data (e.g. permission slips). Search, dedupe, and contact sync still work with encryption on.
Data retention
Set a number of days after which the sensitive fields of form submissions are automatically redacted (the submission and its non-sensitive answers are kept). Valid range is 1–3650 days; leave it blank to keep everything indefinitely. When active, redaction runs nightly.
PII access log
An audit log records who viewed, exported, edited, or redacted personal data (most recent 100 entries), with the timestamp, the actor, the action and subject type, and the number of records affected. This gives you a defensible record of every access to sensitive data.
Billing
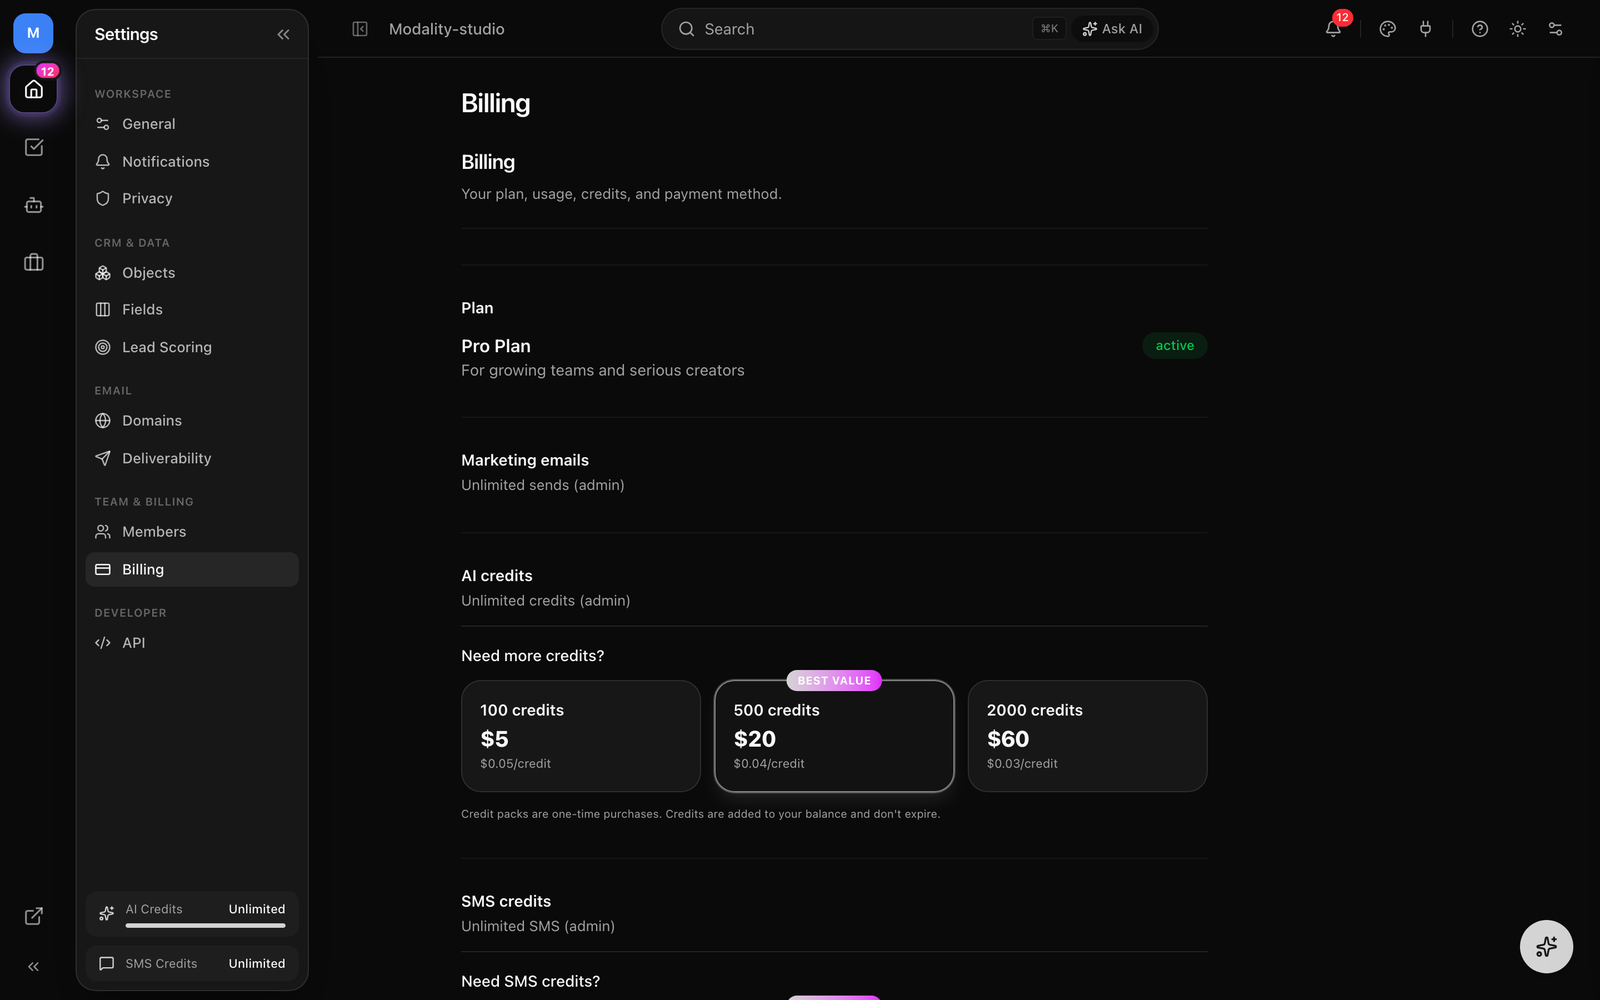
Manage your subscription, watch usage, buy prepaid packs, and open the Stripe billing portal. Subscriptions are managed on the web (there's no in-app purchase).
Plans
- Free ($0), unlimited contacts, unlimited events with ticketing, 3 forms, 1 bookable venue, 3 e-sign documents, 50 AI credits/month, 1 integration, 1 team member, and a 1.9% ticketing fee. Marketing email sending is not included.
- Pro ($29/mo, or $24/mo billed yearly), everything in Free plus unlimited forms & venues, 10,000 marketing emails/month, 100 SMS/month, 750 AI credits/month with AI agents, 25 automations & sequences, custom branding & promo codes, all integrations, 5 team members, and a 0.9% ticketing fee.
- Business ($79/mo, or $66/mo billed yearly), everything in Pro plus unlimited automations, 50,000 marketing emails/month, 500 SMS/month, 2,000 AI credits/month, unlimited team members, custom domains, API access, and a 0.5% ticketing fee.
Usage & prepaid packs
Metered usage is shown with progress bars that turn amber then red as you approach a limit:
- Marketing Emails, plan sends used this cycle, with optional metered overage billing (per-email rate) and one-time send-packs that never expire and are used before any overage.
- AI Credits, plan credits used this cycle, plus one-time credit packs that don't expire.
- SMS Credits, segments remaining (1 credit ≈ one 160-character segment), topped up with SMS packs. Texts send via Modality unless you connect your own Twilio.
Use Manage billing to open the Stripe customer portal (update payment method, cancel, or switch plans). Upgrades and pack purchases redirect to Stripe checkout.
API Keys
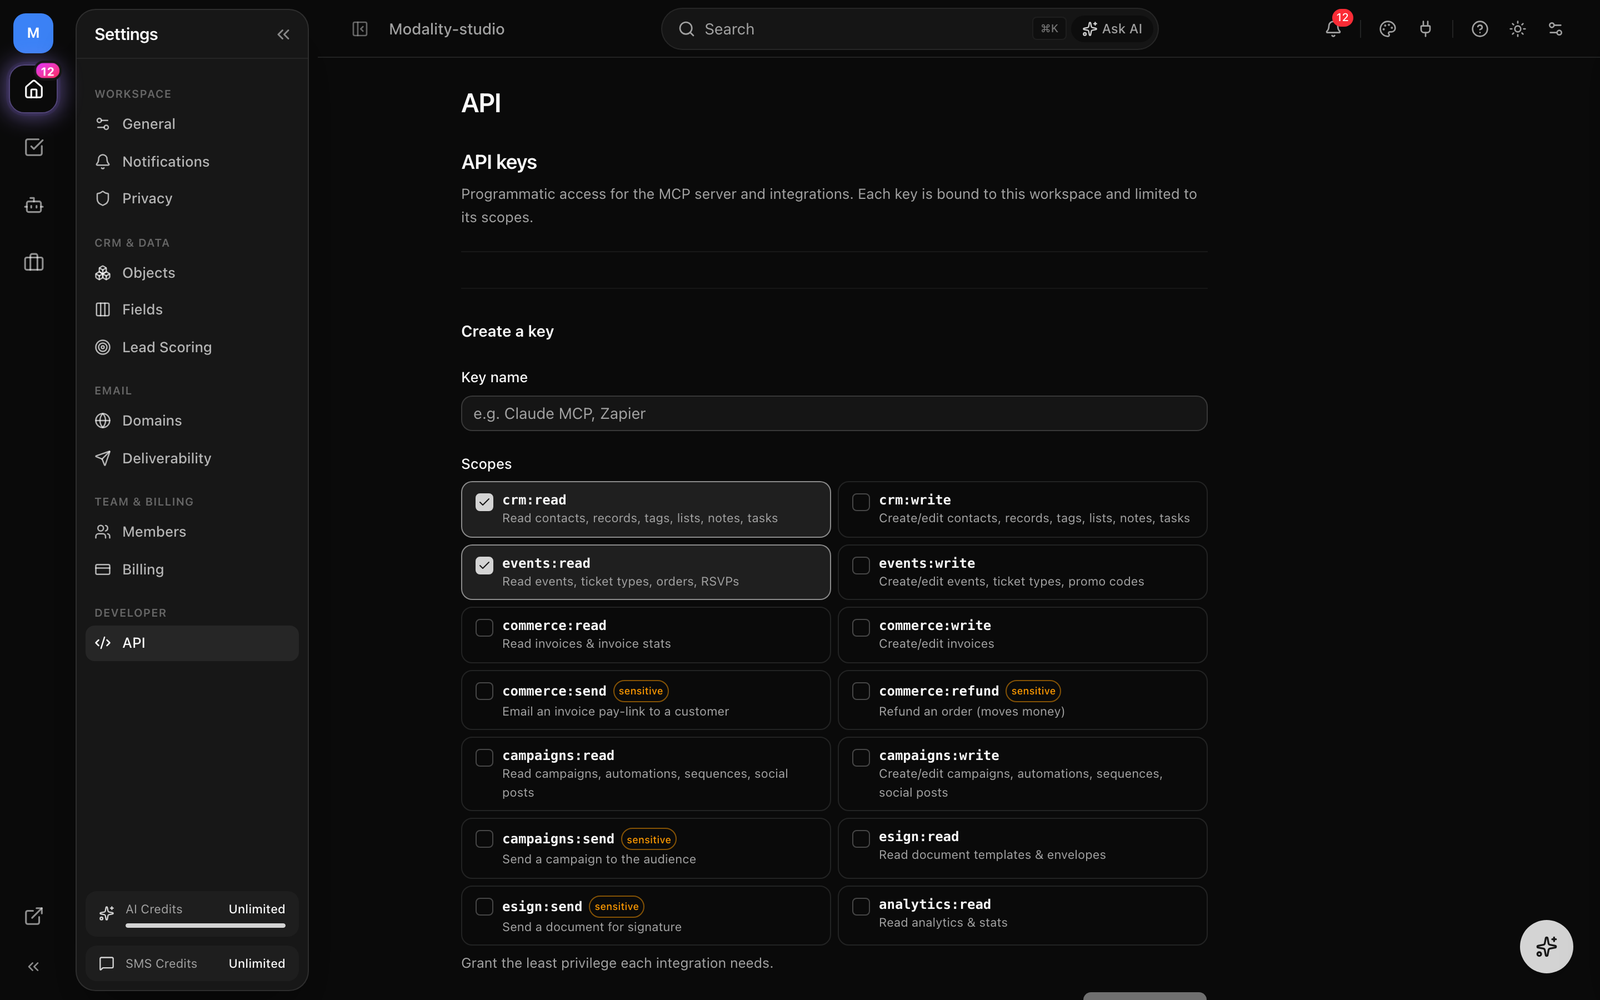
The API tab issues programmatic keys for the MCP server and your own integrations. Each key is bound to this workspace and can only do what its scopes allow. API access is a Business-plan feature, on lower plans the tab shows an upgrade prompt.
Creating a key
- Name the key (e.g. "Claude MCP" or "Zapier").
- Select the least-privilege set of scopes it needs, then click Create key.
- Copy the secret from the one-time reveal banner, it is shown only once and can't be retrieved later.
Scopes
Scopes are split into read, write, and deliberately-granted sensitive scopes (which spend money or send externally):
- crm:read / crm:write, contacts, records, tags, lists, notes, tasks.
- events:read / events:write, events, ticket types, orders, RSVPs, promo codes.
- commerce:read / commerce:write, invoices and invoice stats.
- commerce:send (sensitive), email an invoice pay-link to a customer.
- commerce:refund (sensitive), refund an order (moves money off the connected balance).
- campaigns:read / campaigns:write, campaigns, automations, sequences, social posts.
- campaigns:send (sensitive), send a campaign to the whole audience.
- esign:read, document templates & envelopes; esign:send (sensitive), email a signature request.
- analytics:read, analytics & stats.
Existing keys list their prefix, scopes, creation and last-used dates. Revoke a key at any time, any integration using it stops working immediately, and revocation can't be undone.
SMS Settings
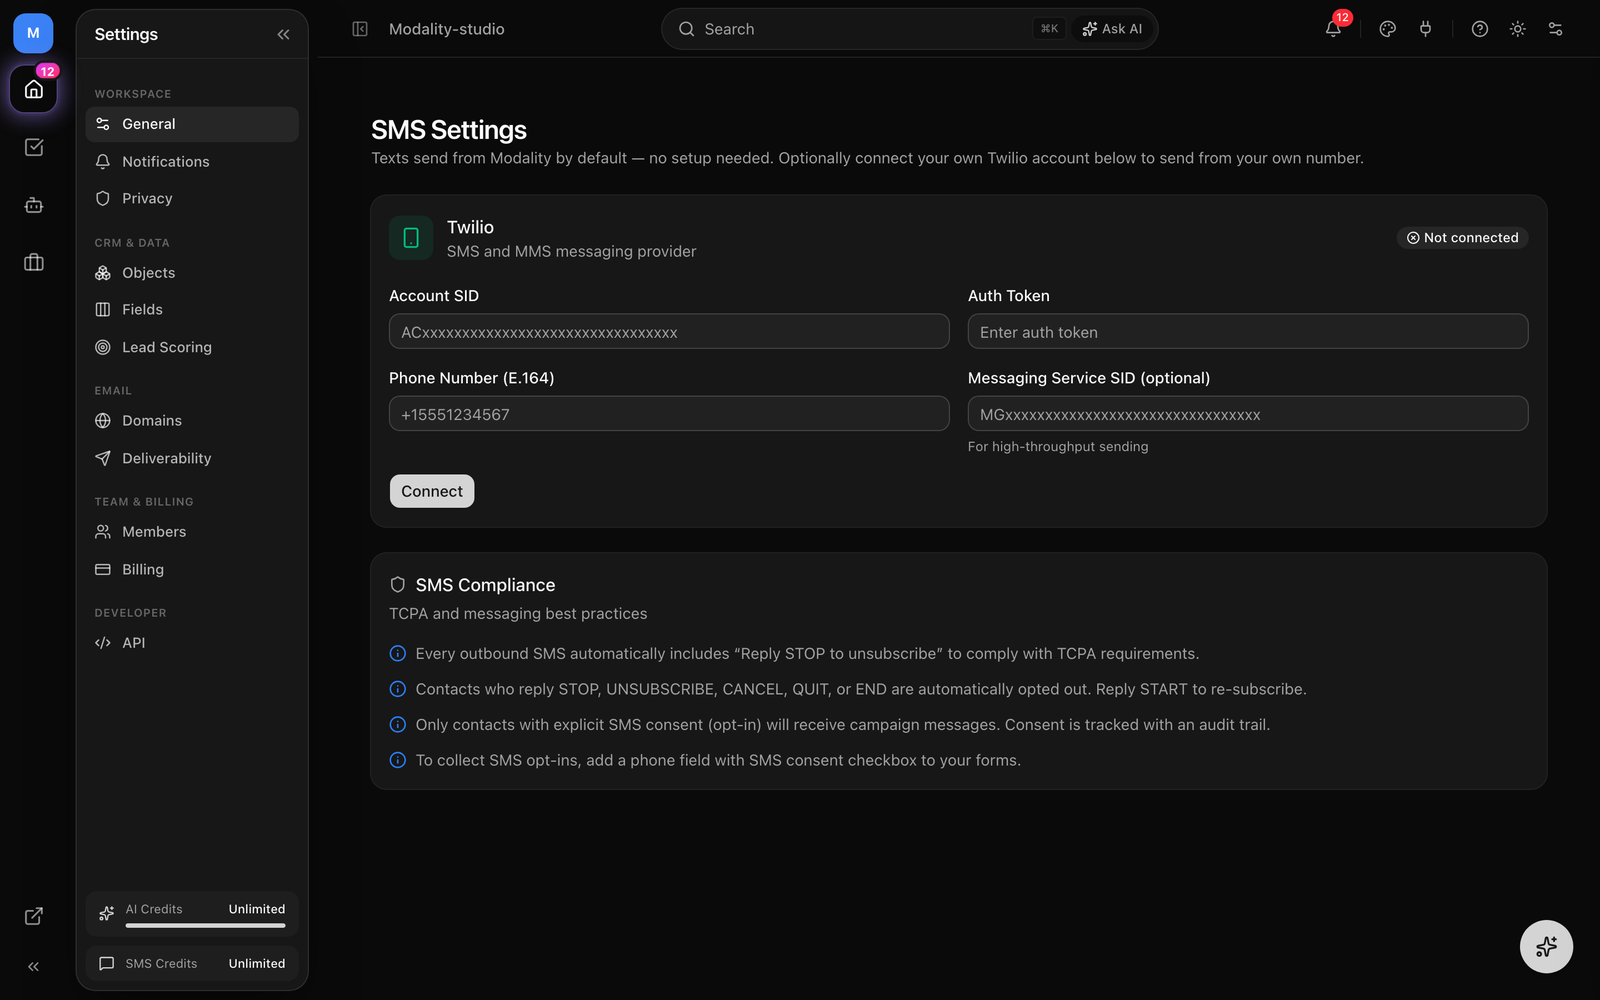
SMS provider setup lives on its own page (SMS Settings), not in the tab bar. Texts send from Modality by default with no setup, you can optionally connect your own Twilio account to send from your own number.
Connecting your own Twilio (optional)
- Enter your Account SID, Auth Token, and a Phone Number in E.164 format (e.g.
+15551234567). - Optionally add a Messaging Service SID for high-throughput sending.
- Click Connect. A status badge shows whether Twilio is connected; use Disconnect to remove it (the auth token is never displayed back for security).
Built-in compliance
- Every outbound SMS automatically appends "Reply STOP to unsubscribe" for TCPA compliance.
- Contacts who reply STOP, UNSUBSCRIBE, CANCEL, QUIT, or END are opted out automatically; START re-subscribes.
- Only contacts with explicit SMS consent receive campaign messages, and consent is tracked with an audit trail.
- To collect opt-ins, add a phone field with an SMS-consent checkbox to your forms.