Lead Scoring
Lead scoring turns raw activity into a single number that tells you who's most engaged. Every time a person submits a form, opens an email, buys a ticket, or checks in, they earn points toward their lead score. The score updates automatically in the background, surfaces your top leads on the dashboard, and can trigger automations the moment someone crosses a threshold you care about.
How Lead Scoring Works
Lead score is a running total stored on each person (contact) record. It works in three parts:
- Scoring rules map an activity type (e.g. "Email Clicked") to a point value. You manage these under Settings → Lead Scoring.
- Automatic scoring, whenever an activity is logged for a person, Modality looks up the matching rule and adds its points to that person's score in the background. No manual work.
- Thresholds & automations, each score increase can fire the
Lead Score Reachedautomation trigger, so crossing a number (say, 50) can add a tag, send an email, or notify your team.
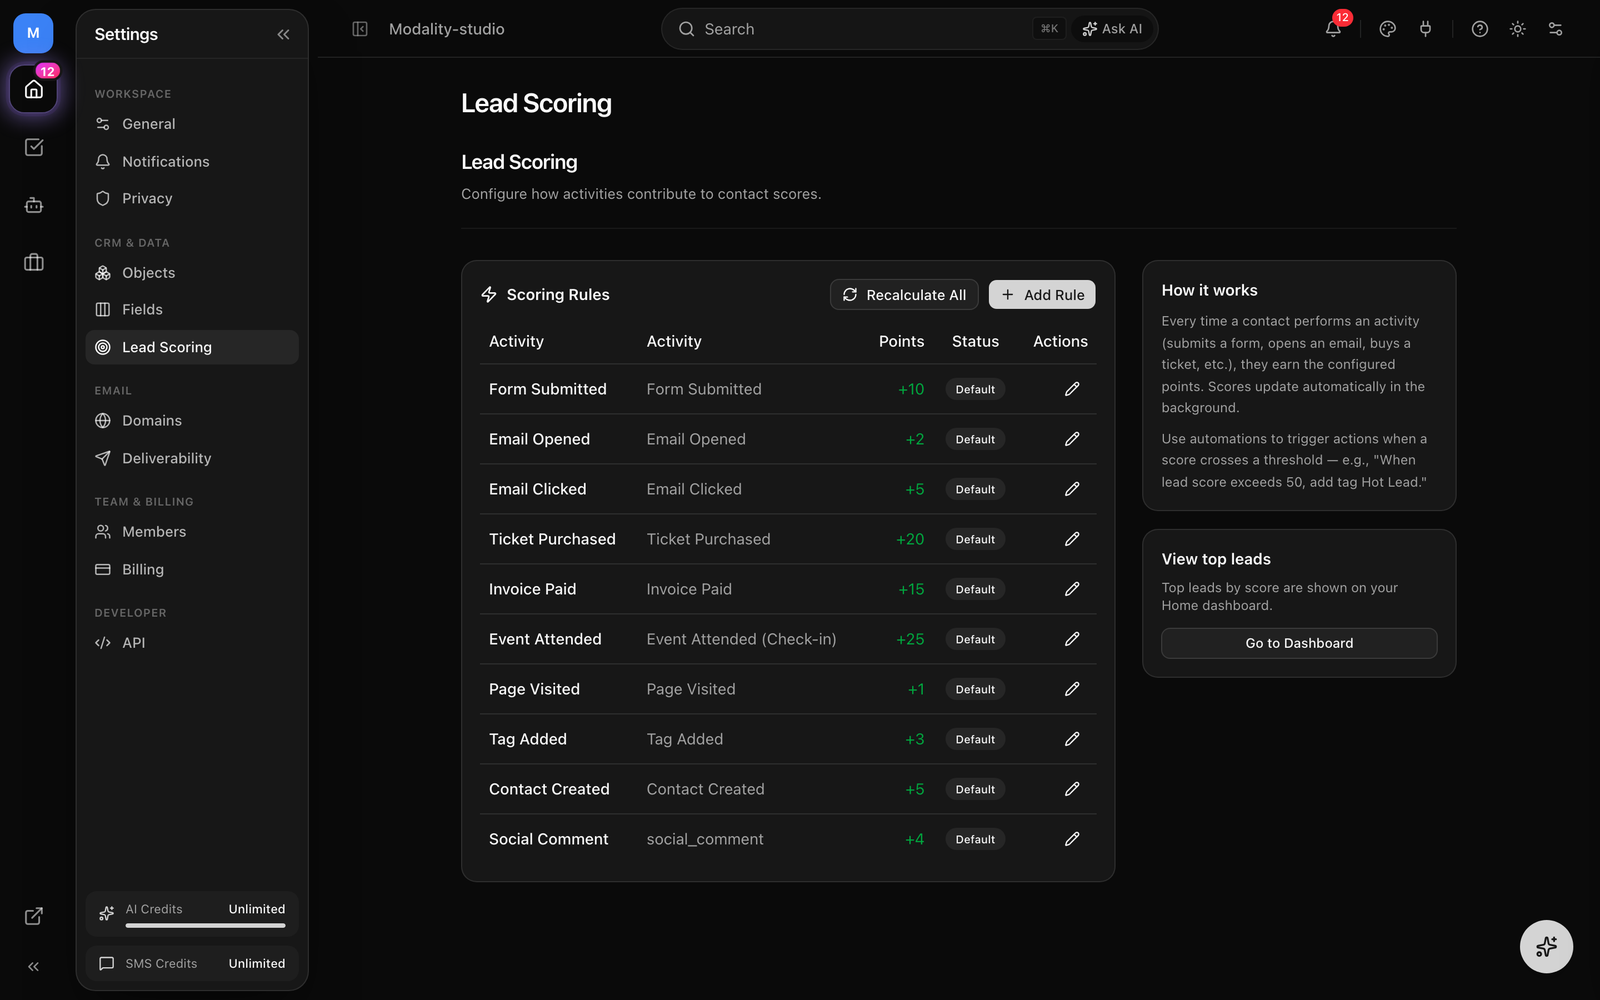
Scoring Rules
A scoring rule has a name, an activity (the event type it listens for), and a point value. The Scoring Rules table lists every rule sorted from highest points to lowest, so your most valuable signals sit at the top.
Built-in Defaults
Until you create your own rules, Modality scores against a sensible set of defaults. These appear in the table with a Default badge:
- Event Attended (check-in),
+25 - Ticket Purchased,
+20 - Invoice Paid,
+15 - Form Submitted,
+10 - Contact Created,
+5 - Email Clicked,
+5 - Social Comment,
+4 - Tag Added,
+3 - Email Opened,
+2 - Page Visited,
+1
Creating a Rule
- 1
Open Settings → Lead Scoring
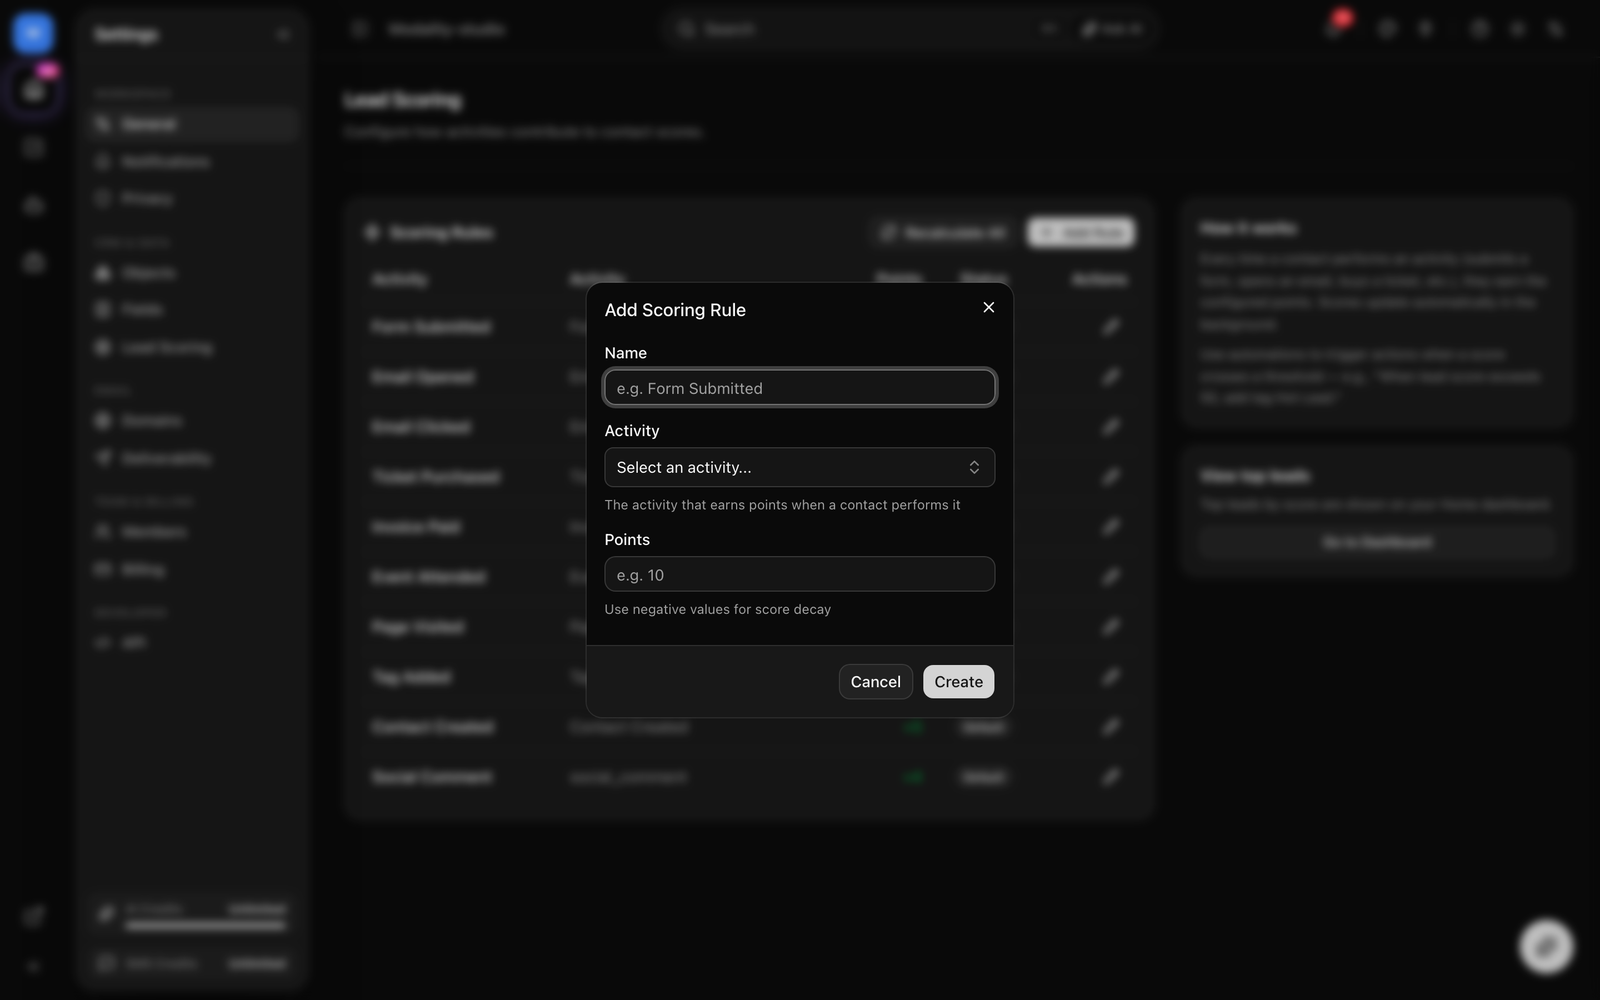
Click Add Rule above the Scoring Rules table to open the rule dialog.
- 2
Name the rule
Give it a clear label (e.g. "Bought a Ticket"). If you pick an activity first, the name auto-fills from the activity, you can always change it.
- 3
Choose the activity
Select the activity that earns points from the dropdown (see Supported Activities below). This is the event type the rule listens for.
- 4
Set the points
Enter a whole number. Positive values add to the score; negative values subtract, which is how you build score decay (e.g.
-5when someone unsubscribes or a tag is removed). - 5
Save
Click Create. The new rule takes effect immediately for activities logged from that point on. Run Recalculate All if you want it applied to past activity too.
Editing, Toggling & Deleting
- Edit, the pencil icon reopens the dialog. For a custom rule you can change the name and points, but the activity is locked (create a new rule if you need a different activity).
- Toggle Active / Inactive, click the status badge on a custom rule to switch it off without deleting it. Inactive rules stop awarding points; defaults can't be toggled.
- Delete, the trash icon removes a custom rule permanently. Defaults have no delete action.
In the table, positive point values show in green with a + sign and negative values show in red, so decay rules are easy to spot at a glance.
Supported Activities
When you add a rule, the activity dropdown covers the signals Modality tracks across the platform:
- Form Submitted, a person completes one of your forms.
- Email Opened / Email Clicked / Email Sent, engagement with your campaigns.
- Ticket Purchased, a completed ticket order.
- Event Attended (Check-in), the person was checked in at the door.
- Invoice Paid / Invoice Payment Received / Payment Completed, money in.
- Contact Created / Contact Updated, the record enters or changes in your CRM.
- Tag Added / Tag Removed, segmentation changes (Tag Removed is a natural decay signal).
- Page Visited, a tracked page view.
- RSVP Submitted, a guest RSVPs to an event.
- Comment Posted / Review Submitted, social and reputation activity.
Automatic Scoring
You never add points by hand. Whenever an activity is recorded against a person, Modality:
- Logs the activity to the person's timeline.
- Looks up the active scoring rule for that activity type (falling back to the built-in default if you have no custom rule).
- Adds the rule's points to the person's lead score, this runs in the background, so checkout and form submissions stay fast.
- Emits the
Lead Score Reachedautomation event with the old and new score, so any matching automation can react.
Because scoring is incremental, a person's score only ever moves when a new activity happens. If a rule awards 0 points (or none applies), the score is left unchanged and no automation fires.
Viewing Your Top Leads
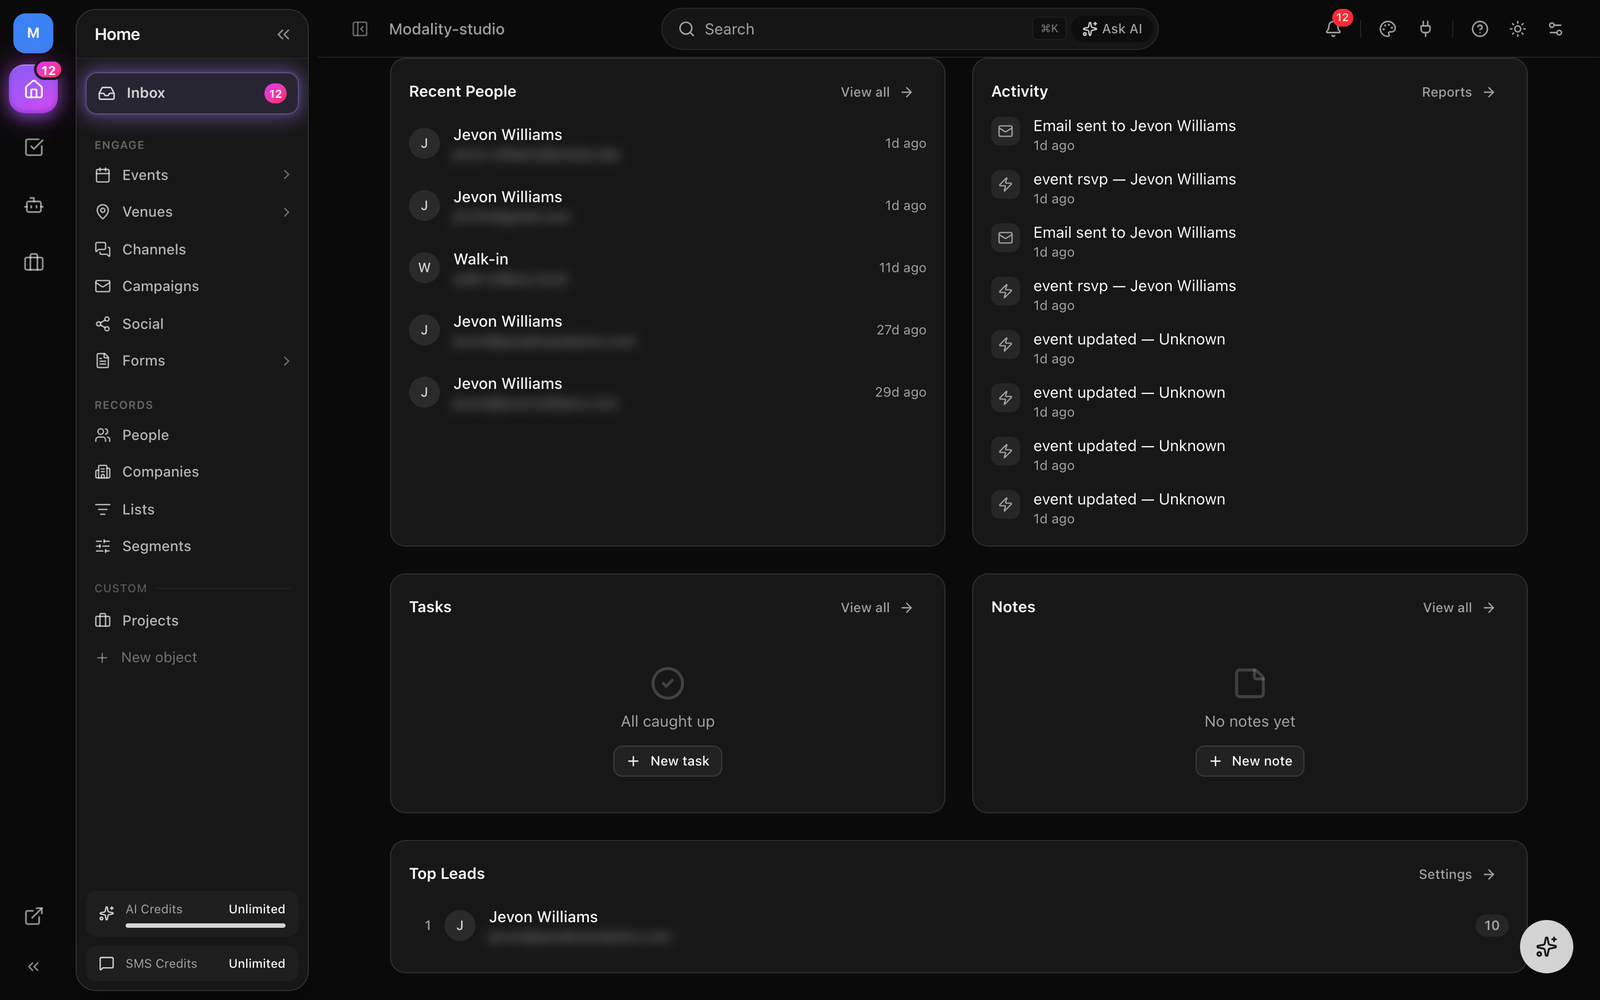
Your highest-scoring people, anyone with a score above zero, ranked from highest to lowest, surface as Top Leads on your Home dashboard. It's the fastest way to see who to follow up with first.
Scores are color-banded so hot leads stand out: 75+ reads as green, 50–74 as amber, and 25–49 as blue. From the Lead Scoring settings page, the View top leads card links straight to the dashboard.
Recalculate All
Automatic scoring only counts activity going forward. When you change your rules, or want scores to reflect historical activity, use Recalculate All at the top of the Scoring Rules table.
Recalculate rebuilds every person's score from scratch: it walks each contact's full activity history and re-sums the points using your current active rules (with built-in defaults filling in for any activity type you haven't customized). The previous score is replaced with the freshly computed total.
- Click Recalculate All.
- Modality reprocesses every contact in the workspace and reports how many were updated.
- Top Leads and any score-based views reflect the new totals.
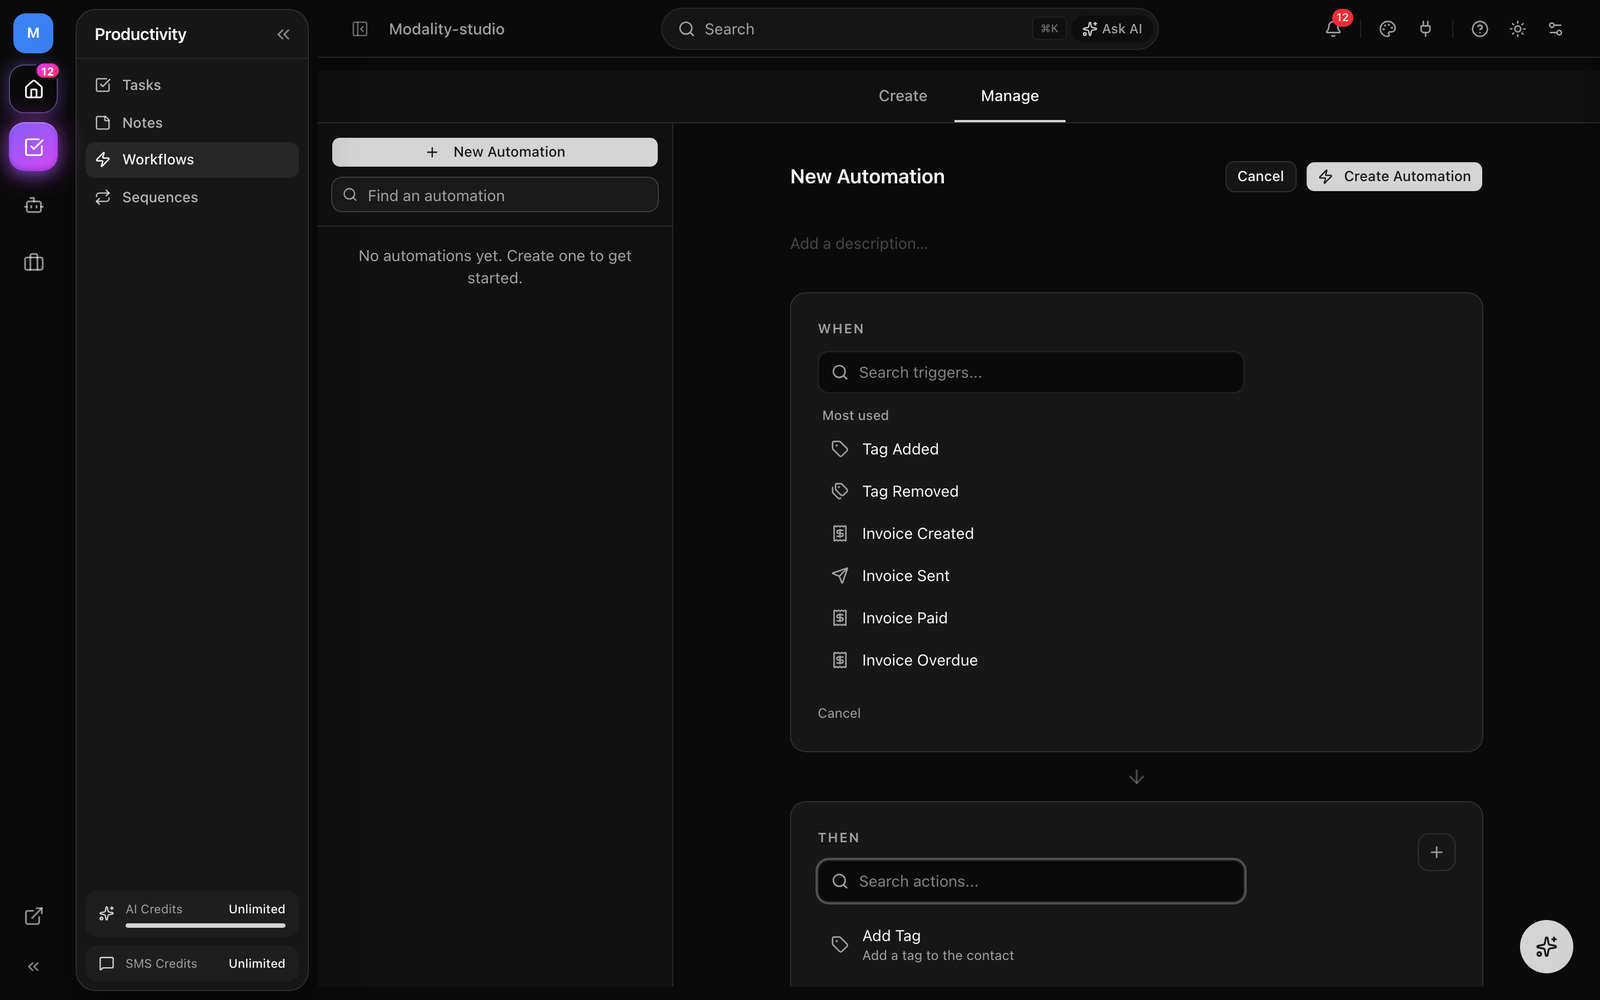
The "Lead Score Reached" Automation Trigger
Lead scores are most powerful when they do something. The Lead Score Reached trigger (in the Automations builder) fires when a person's lead score crosses a threshold you set.
How the Threshold Fires
Set a numeric threshold on the trigger. The automation runs once, on the upward crossing, that is, when the score was below the threshold and the latest activity pushed it to or above it. It won't re-fire on every subsequent point gain while the score stays above the line, so a "Hot Lead" workflow runs exactly once per person as they cross.
Building the Automation
- 1
Create an automation
In Automations, start a new automation and choose Lead Score Reached as the trigger.
- 2
Set the threshold
Enter the score that should fire the workflow (e.g.
50). - 3
Add actions
Pick what happens on the crossing, for example, add the tag Hot Lead, send a follow-up email, create a task, or notify a teammate.
- 4
Activate
Turn the automation on. From then on, every person who crosses the threshold triggers it once.
Because the crossing is evaluated per rule, you can stand up several tiers at once, for instance one automation at 25 (warm), one at 50 (engaged), and one at 75 (sales-ready), each with its own actions.